Creating The Perfect Wall Gallery With Photos and Art
Creating The Perfect Wall Gallery With Photos and Art is a wonderful way to showcase your collection of art and family photos. There is something about walking into a home and seeing photos around it that just makes it feel cozy and inviting.
A wall gallery is a great way to showcase your personality and style while transforming a blank wall into a stunning focal point. Whether you’re working with family photos, vintage art, or abstract pieces, creating a beautiful gallery wall is easier than you might think.
In this post, I will share a step-by-step guide, tips for success, and answers to common questions to help you design the perfect gallery wall for your own home.
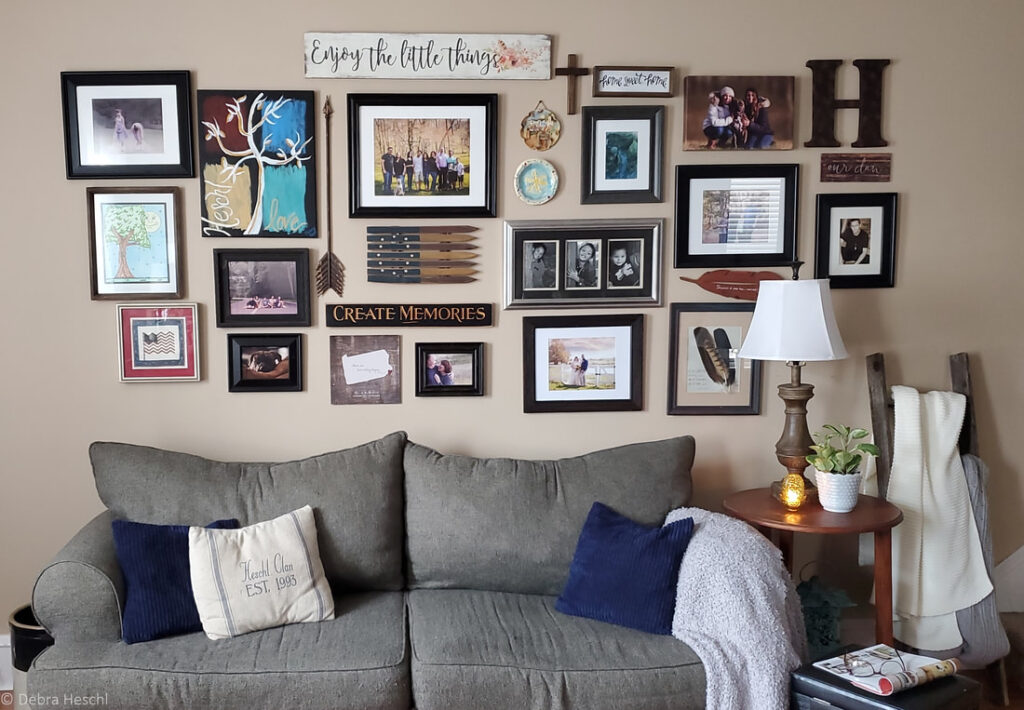
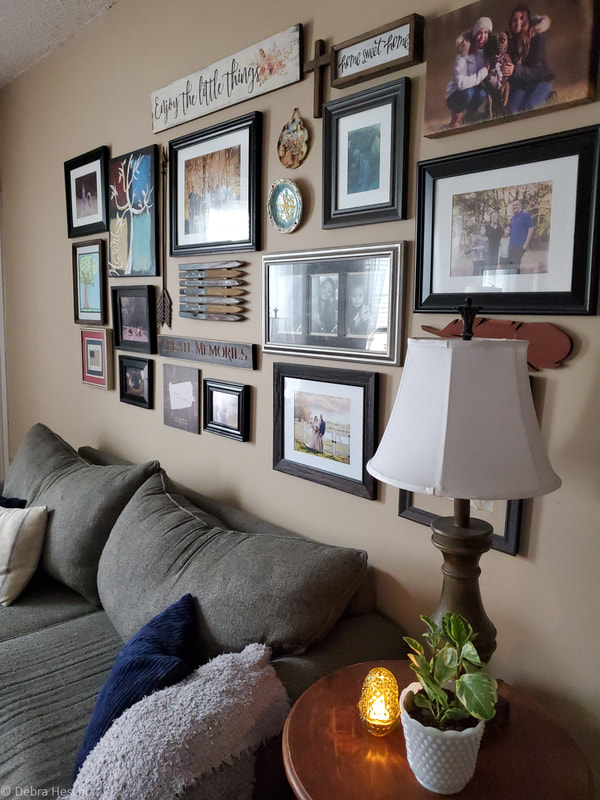
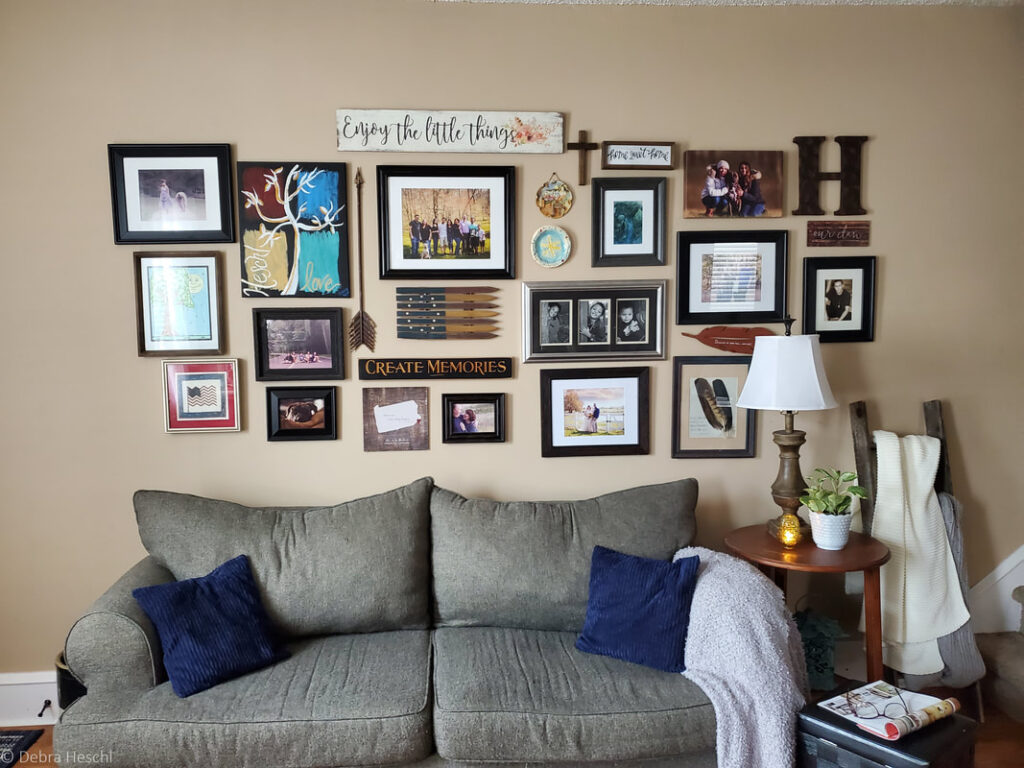
When we moved into our home, one of the first things we did was start putting all the photos and memorabilia together for Designing a Wall Gallery. Once I had it all together, I started creating a wall gallery to showcase my clan, adding some architectural elements as well.
As an Amazon Associate, I earn from qualifying purchases, and this post contains affiliate links to products I love ♥ See my full disclaimer here!

Make a statement when Designing a Wall Gallery
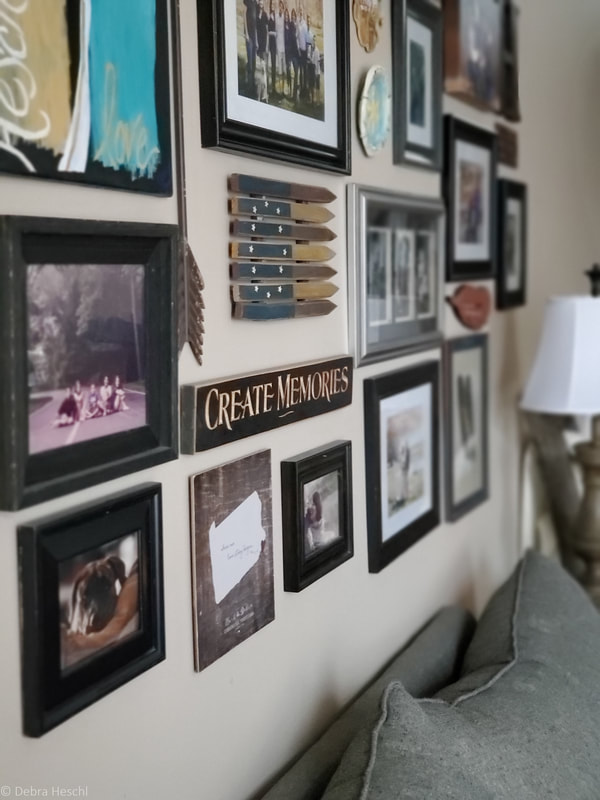
Adding large frames to showcase your photos makes a statement. I personally like 5×7 frames up to 16×20. I add a mixture of sizes, and in between, I add some memorabilia. It can be an art piece or an antique that you love. Display what brings you joy! If you don’t like what you see, that’s okay. Take a few days to ponder and rework it until your heart is content.
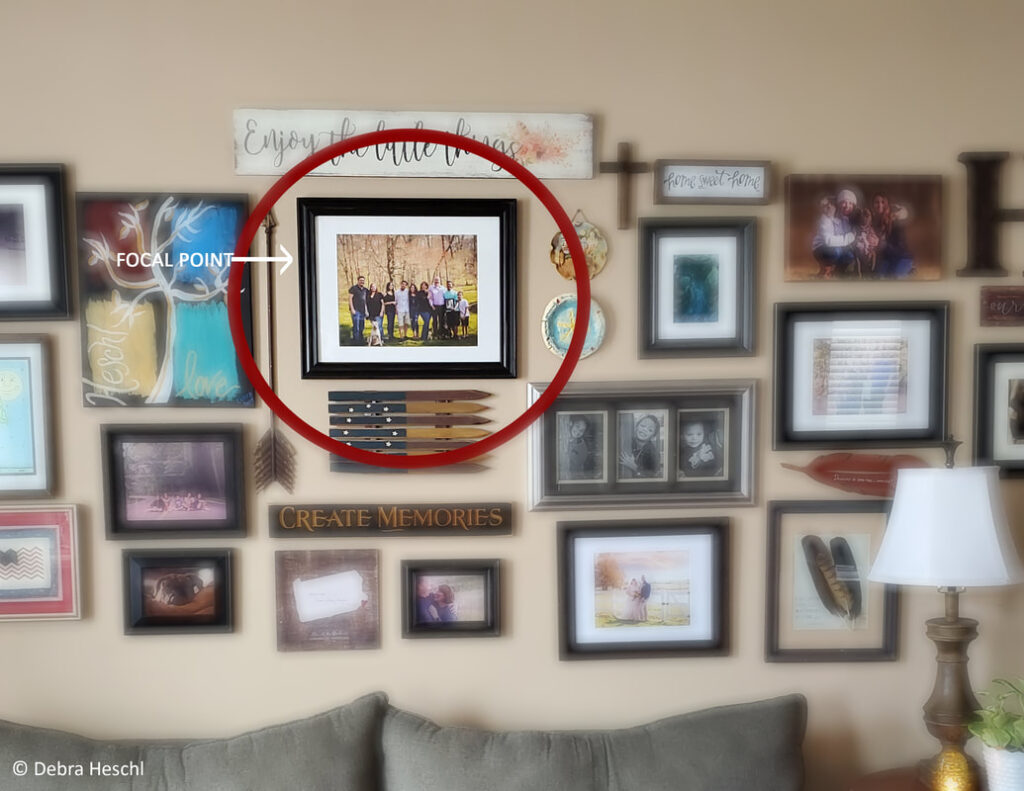
Start Your Wall Gallery with the Focal Point
I start by adding a large photo of my clan. Then, from there, I place the photos and/or memorabilia around that focal point, spreading out to your desired length and width. I chose to go beyond the length of my couch. Then, I add around the top and bottom.
You can choose the layout of your gallery wall based on your style and the room’s purpose. Whether you prefer a symmetrical arrangement or a more eclectic look, ensure the layout feels balanced and visually appealing. Experiment with different styles, and don’t be afraid to let your creativity shine!
You can find examples on Pinterest. Lay the photos on the floor as you would like them placed on the walls. I have done several wall galleries; adding them to the wall was easy for me. I envisioned how I wanted it to look and achieved it.
5 Tips for How to Perfectly Lay Out Your Wall Gallery Design
Here are five tips for laying out your gallery wall design before adding pieces to the wall:
- Outline the Wall Space with Painter’s Tape: Use painter’s tape to mark the dimensions of your wall space on the floor. This provides a clear boundary for your layout.
- Start with the Largest Piece: Place the largest or most prominent piece at the center or a focal point, then arrange other pieces around it.
- Balance the Sizes: Distribute various sizes evenly across the layout to create visual balance and avoid clustering similar sizes.
- Test Different Arrangements: Move pieces around the taped area to explore different layouts and find the most visually appealing arrangement.
- Take a Photo: Once satisfied with the arrangement, take a photo for reference when transferring the design to the wall.

Common Mistakes to Avoid
- Avoid overcrowding the wall. Fitting too many pieces into a small space can overwhelm the wall. Leave enough negative space for each piece to stand out.
- Uneven spacing and inconsistent gaps between pieces can disrupt the flow of your gallery wall. Aim for equal spacing, typically 2-3 inches, for a cohesive look.
- Using pieces that are too small for the space. Small art or frames can get lost on a large wall, making the display look sparse. Balance the layout with larger pieces to anchor the design.
- Don’t ignore balance and proportion. Placing all the large pieces on one side can make the wall feel lopsided. Distribute sizes evenly for visual harmony.
- Hanging pieces t too far above or below eye level can make them harder to enjoy. Keep the center of the display at eye level for the best effect.
Ideas to Clean or Update Your Gallery Wall
Seasonal Updates: Swap out some pieces for seasonal artwork or family photos, such as holiday-themed prints or summer vacation memories.
Rotate Art and Photos: Keep the gallery fresh by rotating new art or photographs every few months. This is a great way to highlight recent family events or new finds.
Incorporate New Pieces: To update the overall look, add dimensional pieces or new frames. Try including a small mirror, a clock, or a sculptural piece for added interest.
Repaint or Reframe: To change the aesthetic, give old frames a new look with a fresh coat of paint or replace them with more modern or vintage frames.
Experiment with Layouts: Rearrange your gallery wall to create a new design. Shift the focal point, adjust the spacing, or expand the gallery to cover a larger wall area.
Clean and Maintain: Regularly dust the frames and glass to keep them looking their best. For fabric or wooden frames, use appropriate cleaning materials to avoid damage.
Tools needed
- Drill
- Mallet
- Leveler
- Screws
- Plastic Molly Anchors
- Command strips (optional)

Step-by-Step Guide to Creating a Gallery Wall
1. Choose Your Wall Space: Decide where your gallery wall will live. Common areas include the living room, kids’ rooms, or even an awkward space like a hallway. Ensure there is enough negative space around your gallery for a balanced look.
2. Select a Starting Point: Begin with the largest piece or focal point. This will anchor your layout and serve as the centerpiece.
3. Gather Your Art: Mix and match family photos, art prints, vintage finds, and dimensional pieces like small sculptures or objects.
For a cohesive look, use a common element, such as a color palette, frame styles, or types of frames, like simple black frames or vintage ones.
4. Lay Out Your Design: Use painter’s tape to outline the dimensions of your wall space on the floor. Experiment with layouts by arranging pieces in various sizes to create visual interest. Include equal spacing between items, typically 2-3 inches.
5. Prepare Your Wall: Use a tape measure and measuring tape to map out your layout on the wall. To hang your pieces, use command strips or nails. Start with the largest pieces and work outward, filling gaps with smaller pieces or random art assortments.
6. Step Back and Adjust: View your gallery wall from different angles to ensure balance and alignment. Adjust as needed to perfect the layout.
Here’s a Trick to Keep Your Frames Straight!
Add a little sticky tack to the bottom of the frame. Before tackling a wall gallery project, check to ensure you know what hardware you need for your wall type.
Note: Too many small frames can make the image look cluttered. If you want to add smaller frames, I recommend limiting yourself to a few.
Choosing The Mounting Hardware
Depending on the type of wall you want in your gallery depends on what hardware you need to use. Our 135-year-old house has the original stone walls. This can make it tricky to hang frames, especially heavy ones. We had to use masonry screws. For lighter frames & art, we also used velcro command strips. Although, I do not recommend using any command strips over your bed.
Tips for a Stunning Gallery Wall
- Use Different Sizes: Combine larger and smaller pieces for a dynamic and eclectic look.
- Stick to a Theme: Choose a unifying element like a cohesive color palette or similar frame color.
- Incorporate Vintage Finds: Antique stores, flea markets, and thrift stores are great places to find unique art and frames.
- Add Dimensional Pieces: Include objects like a dimensional object or furniture beneath your gallery for added depth.
- Keep It at Eye Level: Hang the center of your gallery wall at eye level for the best visual appeal.
Frequently Asked Questions
What’s the easiest way to start a gallery wall?
Begin with a single large piece as your starting point and build around it. Lay out your design on the floor before committing to hanging anything.
How do I choose the right pieces for my gallery wall?
Pick works of art, personal photos, or vintage finds that reflect your personality. Incorporate different styles and art pieces for an eclectic gallery wall.
How much space should I leave between pieces?
Aim for 2-3 inches of space between frames to maintain a cohesive look without overcrowding.
Can I mix frame styles and colors?
Yes! Mixing frame styles, such as black, white, or metallic ones, can add variety. Use a common element to tie the look together.
What if I don’t want to use nails?
Command strips are a good way to hang frames without damaging walls. They’re ideal for renters or those who frequently change their decor.
Final Thoughts
Creating a gallery wall is a fun and creative way to showcase your favorite pieces of art and family photos. With inspiration and careful planning, you can design a gallery wall that brings visual interest to any room.
Whether you’re working with a gallery wall design service or curating your personal gallery wall, the possibilities are endless. So grab your tape measure, visit a few flea markets, and turn your blank wall into a masterpiece!
If you want to follow along on our home restoration/renovation plans and all of our exciting antique & thrift finds, be sure to check out Linen and Wildflowers on Facebook, Instagram, and Pinterest! And don’t forget to sign up for our newsletter to receive updates.
Here are some recommended posts that may Fancy your interest!
Where to Find Free Art for Your Home Decor
How to Turn a Print into a Faux Authentic Oil Painting
Simple DIY Feather Art Piece Perfect For Your Walls

Gain Access to the Freebie Library
Accessing the freebie library is easy and provides many helpful resources to boost creativity and organization. Inside, you’ll find a variety of free downloads like art prints, handy checklists, a cleaning list, a gardening journal, and much more. Whether you want to stay organized, inspired, or add charm to your home or work, these freebies are designed to help you along the way! Visit the library, pick what you need, and enjoy these exclusive resources today.