How to Reupholster An Old Footstool – Easy DIY
How to Reupholster an Old Footstool is an easy DIY project with minimal effort. With just a few tools and a little patience, you will have your step stool reupholstered in no time and looking as good as new.
Is your little stool looking a bit worn out? Giving a pre-loved stool a fresh, new look with reupholstery is an easy and budget-friendly craft project. Whether you have a footstool that has seen better days or a top-shelf footstool that needs a makeover, in this guide, I will walk you through the process step by step on how to reupholster an old footstool. With a few simple tools and materials, your stool will look brand new in no time!

Last week, while I was in Lancaster with my family, I stopped at this little thrift store. As I entered the front door, I saw this footstool under the table. It was only $10, but I wasn’t sure because I didn’t like the pattern, so I put it back under the table. I continued walking around and couldn’t stop thinking about that footstool.
Although I knew I could change out the fabric, I didn’t know if I wanted to be bothered with another DIY project. The more I thought about it, the more I figured it was an easy project and that I would regret it if I didn’t get it. So, I went back, and the footstool went in my cart.
Materials Needed:
- Old footstool
- New fabric of your choice
- Staple gun
- Spray Glue (Optio
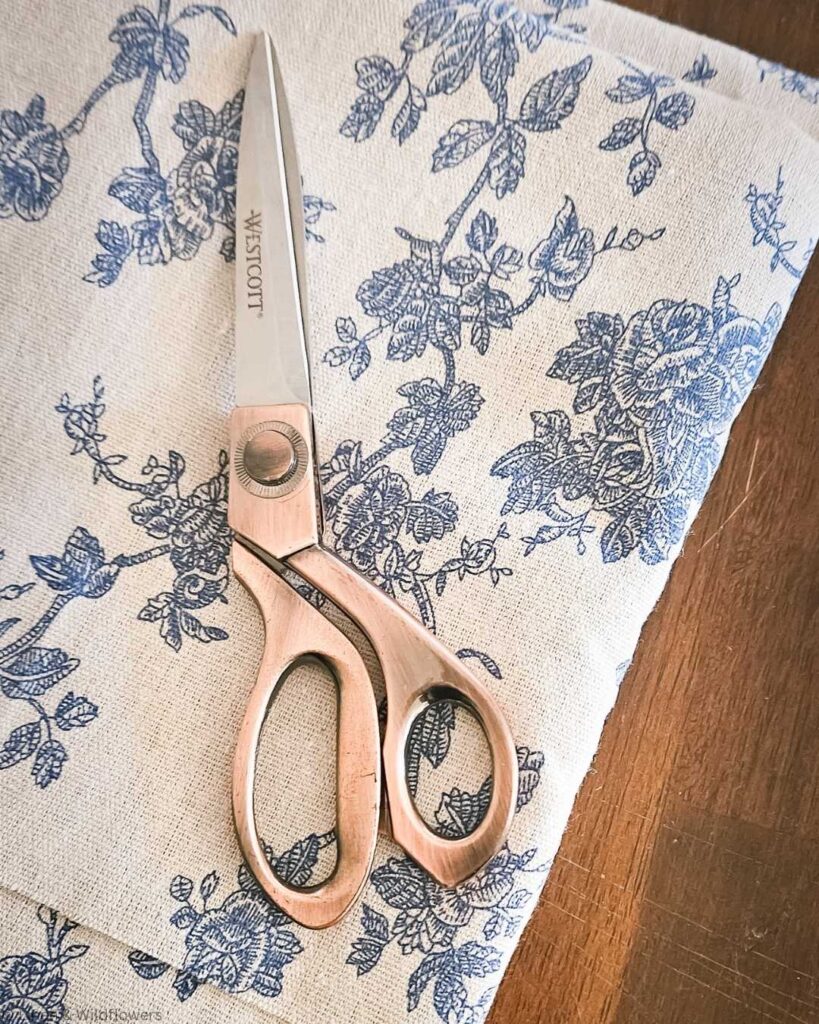
- Scissors
- Screwdriver (if needed)
- Padding (foam or batting, if replacing)
- Pliers (for removing old staples)
Step-by-Step Instructions:
Step 1: Remove the Footstool Top
Turn the footstool upside down and locate the screws or nails attaching the top to the frame. Use a screwdriver or pliers to carefully remove the top. Set aside any hardware for reassembly later.
Step 2: Remove the Old Fabric
Flip the top over and check the underside for staples. Use pliers to pull out the staples and remove the old fabric. If the padding is still in good shape, you can reuse it or replace it with new padding for extra comfort.
Step 3: Cut New Fabric and Padding
Lay your new fabric flat and place the old fabric on top as a guide. Cut around it, leaving an extra 1-2 inches on all sides. If padding is being replaced, cut a piece of foam or batting to fit the top.
Step 4: Attach the Padding
Place the new padding on the stool’s top. If using spray glue, apply a light mist to hold the padding in place.
Step 5: Secure the Fabric
Place the top upside down on the wrong side of the fabric. Pull one side of the fabric tightly over the edge and staple it to the underside using a staple gun. Move to the opposite side, pull the fabric taut, and staple it in place. Repeat for the remaining sides, ensuring the fabric stays smooth and secure.
Step 6: Staple the Corners
Make small pleats as you staple for rounded corners to create a smooth look. For square corners, fold the fabric neatly, like wrapping a gift, and staple it securely. Trim any excess fabric to keep the underside tidy.
Step 7: Reattach the Top to the Footstool
Once the fabric is securely attached, align the top with the stool frame and screw or nail it back in place.
Common Mistakes and How to Avoid Them
Troubleshooting:
The fabric is wrinkling after stapling
Remove the staples and try again, ensuring the fabric is pulled taut before stapling. Work from the center outward to distribute tension evenly.
The staples won’t go in all the way
If the wood is too hard, try using shorter staples or tapping them in with a hammer after stapling. You can also pre-drill small holes to make stapling easier.
The fabric keeps shifting while stapling
Use spray glue to lightly secure the fabric in place before stapling. You can also start with a few temporary staples to hold the fabric while you adjust it.
The padding is uneven or lumpy
Smooth out the padding and secure it with spray glue before adding fabric. If needed, trim any excess padding to create a uniform surface.
The seat won’t reattach properly
Check for excess fabric underneath that might be blocking the screws or nails. Trim as needed and ensure the seat aligns correctly with the frame.
Helpful Tips
FAQs:

How to Reupholster An Old Footstool
How to Reupholster an Old Footstool is an easy DIY project with minimal effort. With just a few tools and a little patience, you will have your step stool reupholstered in no time and looking as good as new.
Materials
- Old footstool
- New fabric of your choice
- Padding (foam or batting, if replacing)
Tools
- Staple gun
- Spray Glue (Optional)
- Scissors
- Screwdriver (if needed)
- Pliers (for removing old staples)
Instructions
Step 1: Remove the Footstool Top
Turn the footstool upside down and locate the screws or nails attaching the top to the frame. Use a screwdriver or pliers to carefully remove the top. Set aside any hardware for reassembly later.
Step 2: Remove the Old Fabric
Flip the top over and check the underside for staples. Use pliers to pull out the staples and remove the old fabric. If the padding is still in good shape, you can reuse it or replace it with new padding for extra comfort.
Step 3: Cut New Fabric and Padding
Lay your new fabric flat and place the old fabric on top as a guide. Cut around it, leaving an extra 1-2 inches on all sides. If padding is being replaced, cut a piece of foam or batting to fit the top.
Step 4: Attach the Padding
Place the new padding on the stool’s top. If using spray glue, apply a light mist to hold the padding in place.
Step 5: Secure the Fabric
Place the top upside down on the wrong side of the fabric. Pull one side of the fabric tightly over the edge and staple it to the underside using a staple gun. Move to the opposite side, pull the fabric taut, and staple it in place. Repeat for the remaining sides, ensuring the fabric stays smooth and secure.
Step 6: Staple the Corners
Make small pleats as you staple for rounded corners to create a smooth look. For square corners, fold the fabric neatly, like wrapping a gift, and staple it securely. Trim any excess fabric to keep the underside tidy.
Step 7: Reattach the Top to the Footstool
Once the fabric is securely attached, align the top with the stool frame and screw or nail it back in place.
Conclusion
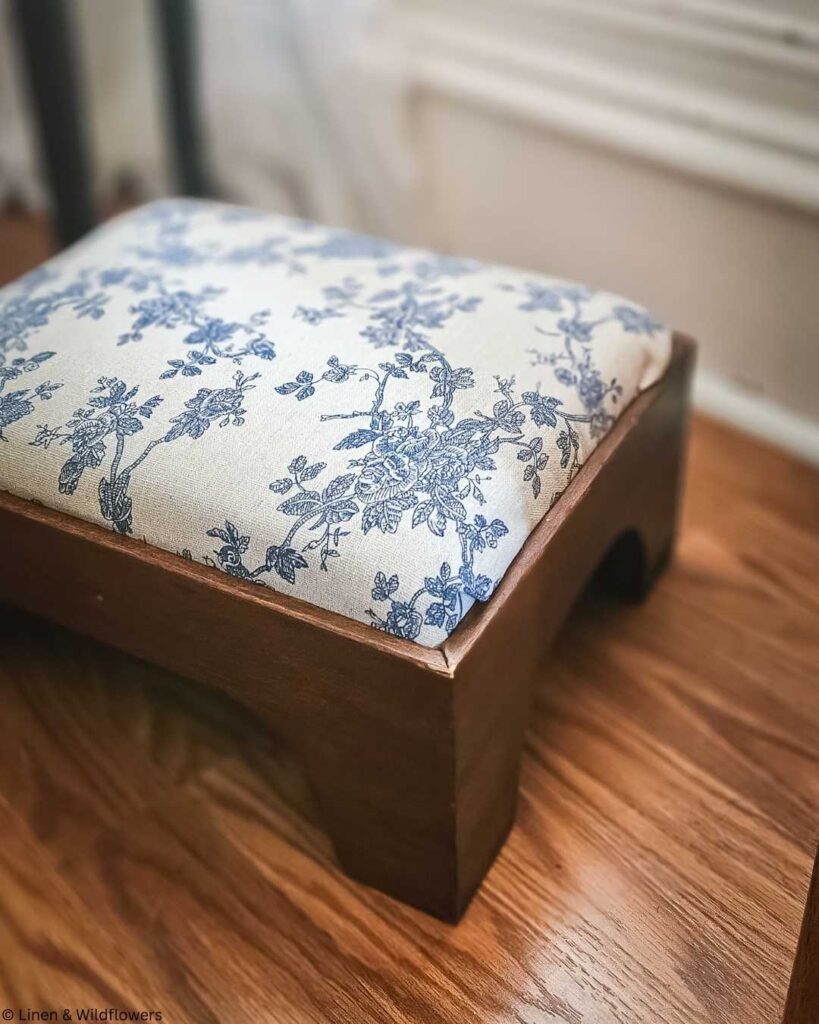
I am so happy with how it came out; the fabric choice is exactly what I envisioned for my space. Reupholstering an old footstool is an easy way to breathe new life into a functional piece of furniture. Grab your staple gun and beautiful fabric, and enjoy your DIY project!

Gain Access to the Freebie Library
Accessing the freebie library is easy and provides many helpful resources to boost creativity and organization. Inside, you’ll find a variety of free downloads like art prints, handy checklists, a cleaning list, a gardening journal, and much more. Whether you want to stay organized, inspired, or add charm to your home or work, these freebies are designed to help you along the way! Visit the library, pick what you need, and enjoy these exclusive resources today.