How to use a Stovetop Percolator
If you want a rich, bold cup of coffee, a stovetop percolator might be your new favorite brewing method. While modern coffee makers brew fast, they don’t always deliver the same deep flavor you get from a percolator.
In this guide, you’ll learn how to use a stovetop percolator step by step, along with helpful tips, the best coffee to use, and how to keep your percolator clean.
I used to rely on an electric coffee maker with a built-in grinder, but no matter how often I descaled it, my coffee kept tasting bitter. It became more trouble than it was worth, especially when all I wanted was a morning cup of coffee. That’s when I went back to a simple stovetop percolator, and I haven’t looked back.
As an Amazon Associate, I earn from qualifying purchases, and this post contains affiliate links to products I love ♥ See my full disclaimer here!

Post Updated January 17, 2026
- If you want a rich, bold cup of coffee, a stovetop percolator might be your new favorite brewing method. While modern coffee makers brew fast, they don’t always deliver the same deep flavor you get from a percolator.
- Why Use a Stovetop Percolator?
- How to Make Percolator Coffee (Step-by-Step)
- Best Coffee for a Percolator
- Essential Parts of a Stovetop Percolator
- Tools Needed to Make Percolator Coffee
- How to Measure Coffee for a Stovetop Percolator
- Percolator Coffee Tips & Tricks
- How to Clean a Stovetop Percolator
- Coffee Beans and Grounds Storage Recommendations
- Frequently Asked Questions
- Final Thoughts
- More Posts You'll Fancy!
Why Use a Stovetop Percolator?
Stovetop percolators offer a classic brewing method with big benefits:
How to Make Percolator Coffee (Step-by-Step)
Follow these simple steps for a perfect brew:
- Fill the reservoir with cold water.
- Place the tube and basket inside the percolator.
- Insert the filter disc (optional)
- Add your desired amount of coffee grounds to the basket.


- Place the basket lid on top and make sure it is secure.
- Heat on medium until it starts percolating, then reduce to medium-low. Brew for 10–12 minutes.
- Once the time is up, remove from the burner and let it rest for about a minute.
- Pour and enjoy; careful, it’s hot!


Pro Tip: Percolating too long or using uneven heat can make coffee bitter. Keep the heat steady for the best flavor. Furthermore, insert the filter disc for a clearer brew. The filter helps catch finer coffee particles, ensuring a smooth cup. If you prefer a richer texture, you can skip the filter.
Safety Reminder: When using a stovetop percolator, practice safe handling to avoid burns. Ensure the percolator is placed securely on the stove and always use oven mitts or a thick cloth when handling, especially when it’s hot. Additionally, never leave the percolator unattended while brewing to prevent accidents.
Best Coffee for a Percolator
A medium roast works best for percolators. Dark roasts can taste overly bitter.
My go-to is Pike Place Roast, but any quality medium roast you love will work beautifully. Consider trying other popular options, such as Colombian Supremo or the smooth, balanced Guatemala Antigua.
These varieties offer wonderful flavors that can enhance your percolator coffee experience. Additionally, don’t be afraid to experiment with unique coffee blends or explore local roasters. You might discover a combination that becomes your personal favorite, adding a new dimension to your morning ritual.
Essential Parts of a Stovetop Percolator
A look at the essential parts of a stovetop percolator, including the basket, tube, spreader, and pot—everything you need for brewing rich, classic coffee.

Tools Needed to Make Percolator Coffee
How to Measure Coffee for a Stovetop Percolator
- Use 1 tablespoon of coffee per 8 oz of water
- For a full 12-cup pot, measure ¾ cup of beans
- Grind just before brewing for the freshest flavor.
Tip: For those who prefer a stronger brew, consider using 1.5 tablespoons per 8 oz of water. If you like a milder taste, start with 0.75 tablespoons and adjust to your liking. If grinding fresh coffee beans isn’t possible, look for pre-ground coffee specifically labeled as coarse ground.
This will work best for percolators and help prevent filter clogging. Store pre-ground coffee in an airtight container in a cool, dark place to maintain its freshness for longer periods
Don’t have a tablespoon or measuring scoop? No problem. You can use a kitchen scale to measure approximately 7 grams of coffee per 8 oz of water for balance. For convenience, a typical household tablespoon is roughly equal to 7 grams of coffee, so you can still get your perfect brew.

Percolator Coffee Tips & Tricks
- Use a coarse grind
- Grind beans right before brewing
- Avoid over-percolating to prevent bitterness
How to Clean a Stovetop Percolator
After brewing, hand-wash your percolator with mild soap and warm water. A thin brush works great for cleaning the tube.
For regular maintenance, wash your percolator after each use to prevent the buildup of coffee oils and residue. For a deep clean, aim to soak your percolator parts once a month using the vinegar cleaning method.
Vinegar Cleaning Method:
- Fill a basin with hot water
- Add 1 cup of vinegar
- Add a small squirt of Dawn dish soap
- Soak all parts for 10 minutes
- Rinse thoroughly
This removes old residue, keeping your coffee tasting fresh.
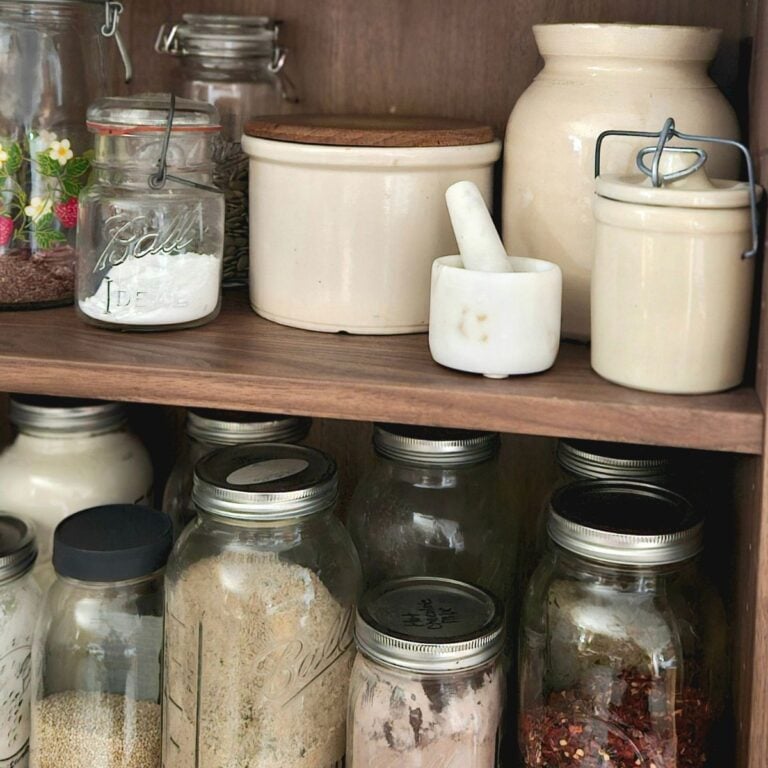
Coffee Beans and Grounds Storage Recommendations
Good coffee starts with great storage. How you store your beans, or grounds makes a big difference in how your coffee tastes, especially when you’re using a stovetop percolator that highlights every flavor nuance.
Keep Beans Whole Until Brewing: Whole beans stay fresh longer than pre-ground coffee. Grind just before brewing for the richest, most aromatic cup.
Store in an Airtight Container: Oxygen is coffee’s enemy. After opening your bag:
- Transfer beans or grounds to an airtight, opaque container. Mason jars are great for storing coffee beans and grounds!
- Avoid clear or loosely sealed bags—light and air speed up staling.
Cool, Dark, Dry Place is Best: Coffee tastes best when stored at room temperature in a cupboard or pantry, away from:
- Direct sunlight
- Heat sources (like stoves or ovens)
- Moisture
Avoid storing coffee in the fridge; the humidity can degrade flavor, and beans can absorb other food smells.
Freeze for Long-Term Storage (Optional): If you buy in bulk and won’t use it quickly:
- Divide the beans into small portions and place in airtight bags.
- Freeze only what you won’t use soon.
- When ready to brew, thaw completely before opening to keep moisture out.
Tip: Don’t refreeze coffee once it’s been thawed.
Use Within Optimal Timeframes:
- Whole beans: Best within 2–4 weeks of roasting.
- Ground coffee: Best within 1–2 weeks of grinding.
For percolator brewing, fresher always tastes better, especially with medium roasts where subtle flavors shine.

Frequently Asked Questions
More Posts You’ll Fancy!
Final Thoughts
There’s something special about making coffee the old-fashioned way. A stovetop percolator doesn’t just brew a cup of coffee; it creates a cozy little ritual. From the familiar bubbling sound to that rich, bold flavor, it’s a simple pleasure that feels both nostalgic and satisfying.
Whether you’re switching from an electric coffee maker or just trying something new, learning how to use a stovetop percolator is an easy way to elevate your daily coffee routine.
With the right grind, proper timing, and a little practice, you’ll be enjoying a smooth, flavorful cup of percolator coffee in no time. So grab your favorite mug, slow down for a moment, and savor every sip. After all, the best coffee is the one that feels like home.
I’ve always used a French press but I never thought to try a percolator. Thank you for sharing! Will be looking in to getting one.
You are very welcome! Oh definitely invest in one. Percolators are fairly inexpensive too.