How to Freeze Sourdough Starter for Long-Term Storage

If you’ve ever needed to take a break from baking, you’ve probably wondered how to freeze sourdough starter without losing all your hard work. The good news? Freezing your starter is a simple and effective way to preserve it for weeks or even months.
In this post, I’ll walk you through how to freeze sourdough starter step-by-step, including what tools you need, how to store it properly, and how to bring it back to life when you’re ready to bake again.
Whether you’re heading out of town, need to slow down your baking routine, or just want a backup in case your main jar goes south, freezing gives you peace of mind without starting over from scratch.
Plus, I’ll share troubleshooting tips and a free printable freezer label and revival checklist to make the whole process even easier!
Looking for delicious dessert recipes? Try my recipe for The Best Homemade Banana Chocolate Chip Muffins , or Lemon Cream Cheese Dump Cake with Homemade Cake Mix.

- If you’ve ever needed to take a break from baking, you’ve probably wondered how to freeze sourdough starter without losing all your hard work. The good news? Freezing your starter is a simple and effective way to preserve it for weeks or even months.
- Why Freeze Your Sourdough Starter?
- What You’ll Need
- My Sourdough Starter Story
- Step-by-Step: How to Freeze Sourdough Starter
- How to Freeze Starter in Wide-Mouth Jelly Jars
- Choose a Freezer-Safe Container
- Recommended Tools for Freezing & Reviving Sourdough Starter
- How to Revive a Frozen Sourdough Starter
- Troubleshooting: When Your Frozen Starter Isn’t Acting Right
- Tips for Success
- Ready to Keep Your Starter Safe?
- Posts You May Fancy
- Final Thoughts
- Looking for Delicious breakfast recipes?
Why Freeze Your Sourdough Starter?
If you’ve been nurturing your sourdough starter for a while, you know it requires regular feeding and care. But what if you’re taking a break from baking or going out of town?
Freezing your sourdough starter is a simple and effective way to preserve it without constant maintenance. Properly frozen, your starter can last in the freezer for up to 12 months, ready to be revived when you need it. Freezing sourdough starter is perfect for:
What You’ll Need
My Sourdough Starter Story
Freezing your sourdough starter might seem like an extra step, but sometimes life reminds us why it’s worth it. Let me share a quick story from my own kitchen.
Not long ago, I had to spend a few days in the hospital for a minor procedure. In the chaos of preparing, I completely forgot to refrigerate my sourdough starter, and by the time I got home, it had gone bad.
All that time and care, gone in just a few days. That’s when I realized the importance of having a frozen backup.
Since then, I always keep a small portion of my starter in the freezer, just in case life throws me a curveball again. It’s such a simple step that gives me peace of mind.
Step-by-Step: How to Freeze Sourdough Starter
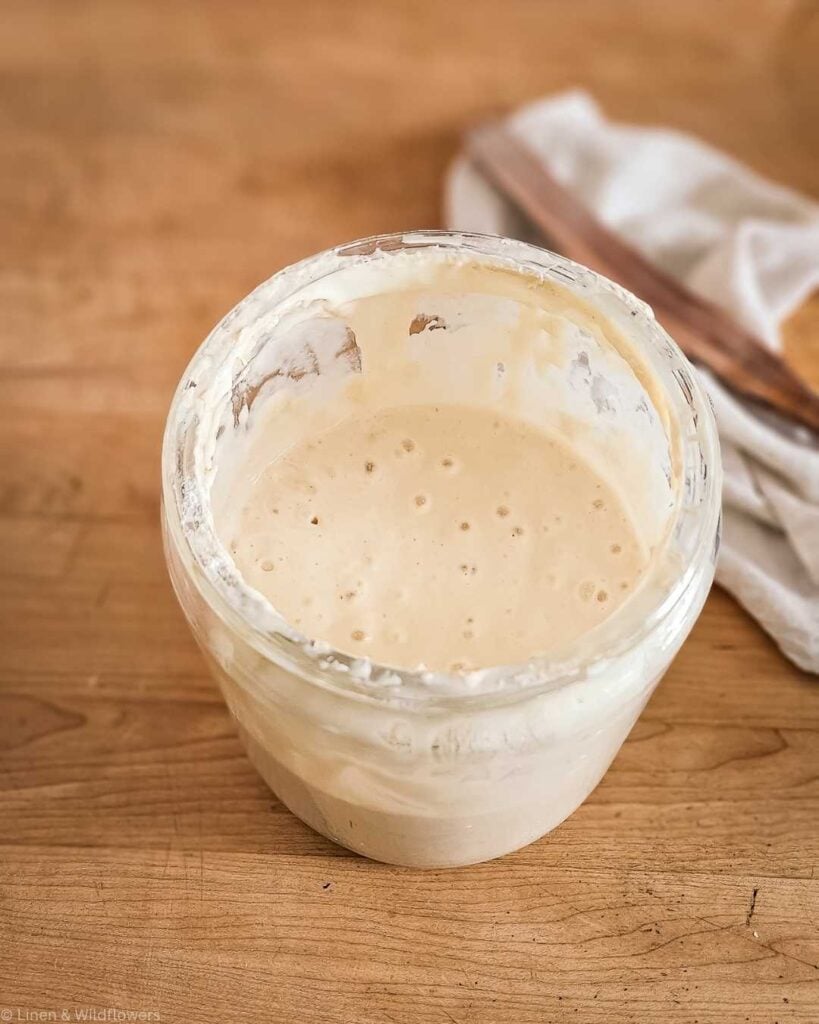
- Start with an Active Starter
- Make sure your sourdough starter is healthy and recently fed. It should be bubbly and doubled in size. Freezing a sluggish or neglected starter could make revival harder later on.
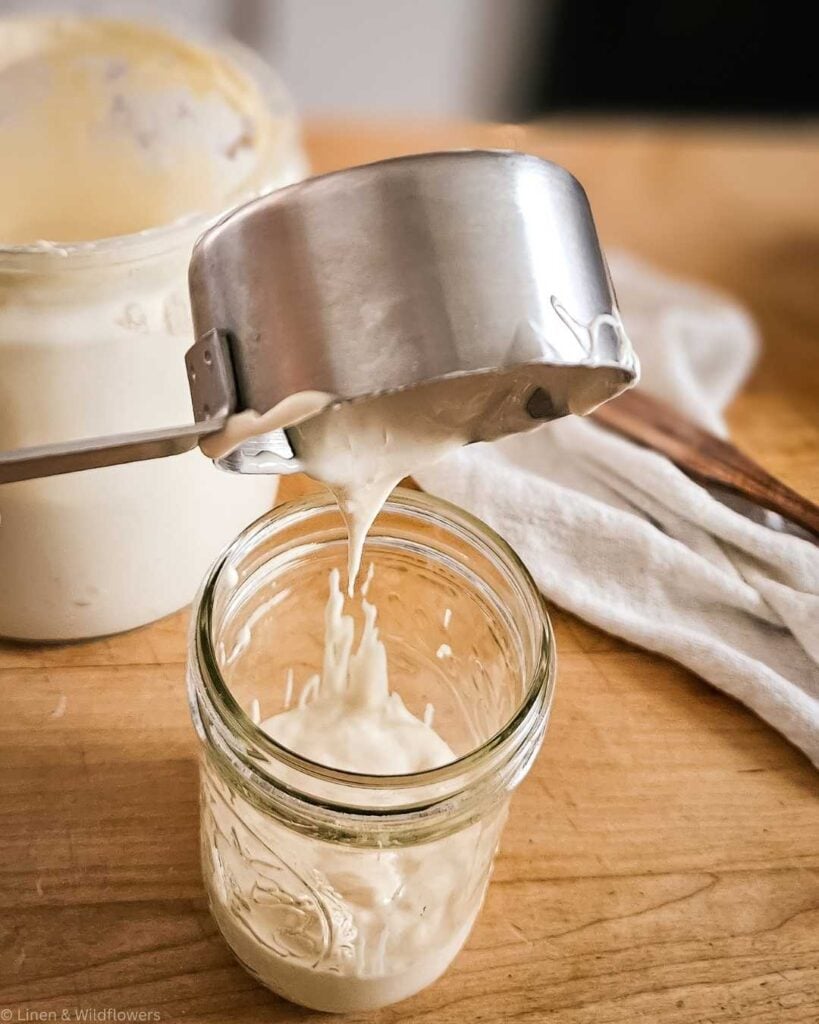
- Portion It Out
- Scoop about 1/2 cup of active starter—this is more than enough to revive later. If you’d like, divide it into smaller portions for easier future use.
How to Freeze Starter in Wide-Mouth Jelly Jars
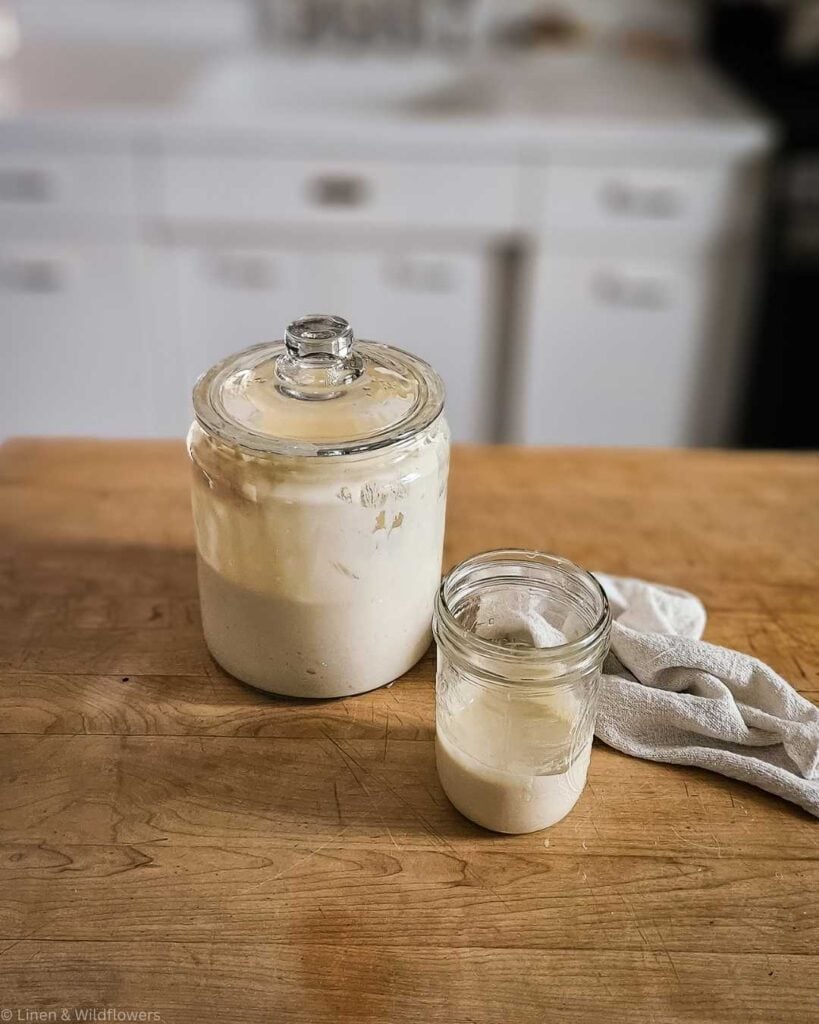
Choose the Right Jar
- Only use wide-mouth jars (straight sides) so the starter can slide out easily after thawing.
- Avoid jars with shoulders—an expanding starter can put pressure on the glass.
Leave Headspace
- Fill the jar no more than halfway (or leave at least 1 inch of empty space at the top).
- Liquids expand as they freeze, and this extra space prevents breakage.
Loosely Cap Before Freezing
- Put the lid on loosely or use a plastic lid with some give while freezing.
- Once the starter is fully frozen, you can tighten it to prevent freezer burn.
Thaw Gently
- Move the jar to the refrigerator overnight or leave at room temperature until thawed.
- Avoid sudden temperature changes (like going from freezer to hot water), which can crack glass.
Extra Tip: If freezer space is limited or you want to portion smaller amounts, you can freeze in silicone ice cube trays first, then pop the cubes into a jelly jar for storage.

Choose a Freezer-Safe Container
You can use a freezer-safe mason jar, silicone mold (like ice cube trays), or a zip-top freezer bag. If using a bag, flatten it out to save space and speed up thawing.
- Label & Date: Write the date on your container or bag. This helps you keep track of how long it’s been stored.
- Freeze: Place your starter in the freezer. That’s it! Your starter will safely rest until you’re ready to bake again.
Recommended Tools for Freezing & Reviving Sourdough Starter
Having the right tools on hand makes freezing and reviving your sourdough starter easier and more efficient. These simple tools make sourdough maintenance feel less like a chore and more like a rhythm.

How to Revive a Frozen Sourdough Starter
When you’re ready to use your starter again:
- Thaw it in the refrigerator overnight or at room temperature for a few hours.
- Once fully thawed, discard half and feed it with equal parts flour and water by weight.
- Let it rest at room temperature and continue feeding every 12–24 hours until it becomes bubbly, active, and ready to bake. Revival usually takes 2 to 5 days.
Troubleshooting: When Your Frozen Starter Isn’t Acting Right
So, you’ve thawed your starter and followed the steps—but it’s not bubbling or rising like it used to? Don’t worry! Revival can take a little time, especially after freezing. Here are some common issues and how to fix them.
My Starter Isn’t Bubbling After 1–2 Days
What’s likely happening:
It’s just taking time to wake up after being dormant. Cold slows down yeast and bacteria.
What to do:
Place it in a warm spot (ideally 75–80°F).
Use filtered or dechlorinated water.
Feed it with a mix of all-purpose and whole wheat flour for a boost.
Tip: Whole wheat flour adds extra nutrients and helps revive sluggish starters faster.
It Smells Sour or Like Alcohol
What’s likely happening:
The yeast is hungry and producing excess byproducts.
What to do:
Feed more frequently (every 12 hours instead of 24).
Discard less if it’s very thin or watery.
Keep it at room temperature for a few days until the smell balances out.
Please Note: A little tang is normal—but if it smells sharp like acetone, it’s a sign it needs food.
It’s Separating or Has Liquid on Top (Hooch)
What’s likely happening:
The starter is underfed or too hydrated.
What to do:
Stir the liquid back in or pour it off.
Feed with a thicker ratio (use less water) to firm it up.
Keep your starter in a cooler place if it’s fermenting too quickly.
It Has Mold or Pink/Orange Streaks
What’s likely happening:
Unfortunately, this means it has gone bad.
What to do:
Discard the starter and clean your container thoroughly.
Use a backup (if you froze multiple portions) or get a fresh starter going.
Never use a starter with colored mold or fuzzy growth—it’s not safe.
Bonus Tip: Be Patient
It may take 3–5 days of consistent feedings to revive a frozen starter fully. If you see small bubbles and some rise, you’re on the right track!
Tips for Success
- Freeze in Small Cubes: Use silicone trays to freeze in small amounts. Once frozen, transfer to a bag for easy use.
- Always Use a Healthy Starter: Don’t freeze a neglected or inactive one—it may not come back.
- Keep a Backup: Always a good idea to have some frozen starter on hand in case something happens to your main batch.
- Glass Jar Freezing: Freezing in glass is safe as long as you give your starter room to expand and handle the jar gently.
If you’re using wide-mouth jelly jars to freeze your sourdough starter, keep these safety tips in mind:
- Leave headspace: Fill jars no more than halfway to allow for expansion.
- Choose wide-mouth jars: Straight-sided jars are less likely to crack than jars with shoulders.
- Cap loosely at first: Freeze with lids slightly loose; tighten after the starter is fully frozen.
- Thaw slowly: Move from freezer to fridge, then to room temperature—avoid sudden temperature changes.
Up to 1 year. The sooner you use it, the better the results.
Not yet! You’ll need to feed and revive it until it’s active again—usually 2–5 days.
That’s normal! It may smell stronger or more acidic at first. Regular feedings will balance it back out.


Ready to Keep Your Starter Safe?
Want to make sure you never forget how to revive your starter? Download my free freezer label printable!
Freezing your sourdough starter is a simple way to take a break without starting over. Want a quick reference guide you can stick on your freezer?
Download my free Sourdough Freezer Label + Revival Checklist to make the process even easier!
Posts You May Fancy


Final Thoughts
Freezing your sourdough starter is one of the easiest ways to ensure you always have a backup. Whether you’re simplifying your baking schedule or just want peace of mind, it’s a great step in maintaining your starter long-term.
Once revived, your starter will be ready to bake up crusty loaves, soft sandwich bread, and everything in between.
Looking for Delicious breakfast recipes?
Grab your 5 breakfast recipes now!
