Homemade Apple Pie Filling (Two Easy Ways: Stovetop & Crock Pot)
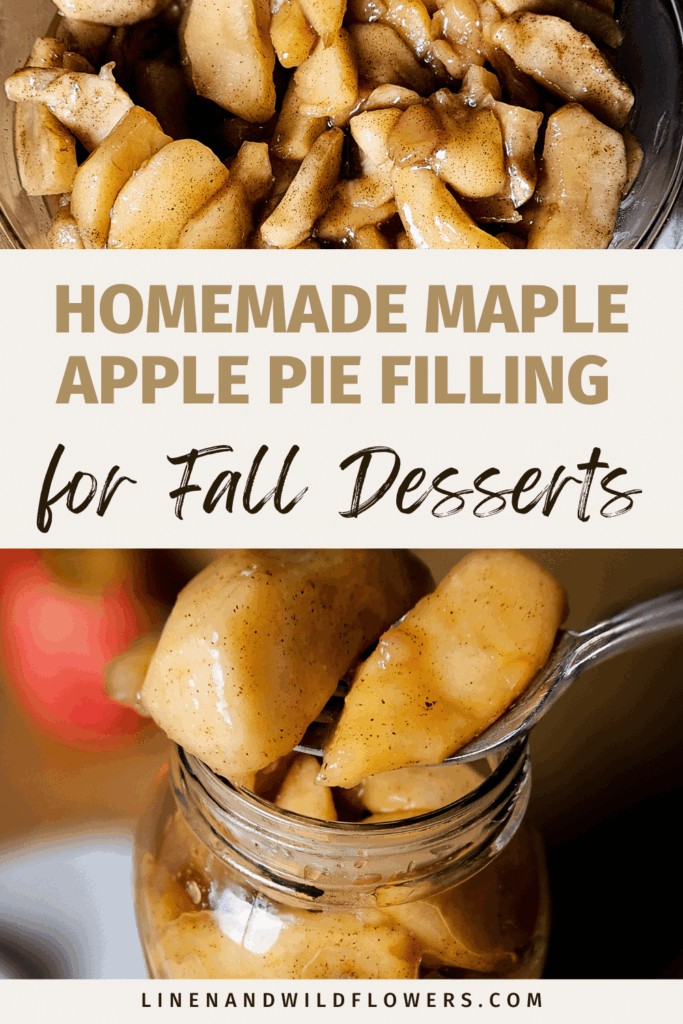
This homemade apple pie filling is perfect for pies, crisps, or spooned over pancakes and ice cream. The best part? You can prepare it in advance and keep it in the freezer, ensuring a fresh-baked apple pie is ready whenever you’re in the mood.
You can make this apple pie filling recipe two easy ways: on the stovetop for a quick, classic version or in the crockpot for a slow-simmered flavor that fills your kitchen with warmth.
Both methods are simple, delicious, and perfect for using up those fresh apples from the orchard. The sweet taste of autumn, made right in your kitchen.
There’s something magical about apple-picking season, that crisp air, the crunch of leaves under your boots, and baskets overflowing with apples in every color.
I came home from the orchard with more apples than I knew what to do with, and my favorite way to use them is by making a big batch of this homemade apple pie filling.
It fills the house with the coziest aroma, cinnamon, maple, and warm apples simmering together, like autumn in a pot.
Looking for easy snacks? Try my recipe, Easy Crockpot Applesauce (With Canning Instructions) or How to Make Southern Fried Apples in a Cast Iron Skillet
- This homemade apple pie filling is perfect for pies, crisps, or spooned over pancakes and ice cream. The best part? You can prepare it in advance and keep it in the freezer, ensuring a fresh-baked apple pie is ready whenever you're in the mood.
- What you'll love about this recipe:
- Recipe Ingredients
- The Best Apples for Pie Filling
- How to Make Crock Pot Apple Pie Filling (Step-by-Step)
- How to Make Stovetop Apple Pie Filling (Step-by-Step)
- Recipe Tips & Tricks
- Make-Ahead Tip
- Make-ahead pies: Fill your pie shell and freeze the whole pie (unbaked). Bake straight from frozen, adding 15–20 minutes to your baking time. Having homemade apple pie filling ready in the freezer means you can enjoy a taste of fall any time of year.
- Storage & Freezing Tips
- More Ways to Use Apple Pie Filling
- Frequently Asked Questions (FAQ)
- More Recipes You'll Fancy!
- Homemade Apple Pie Filling (Two Easy Ways: Stovetop & Crock Pot)
- Looking for Delicious breakfast recipes?
What you’ll love about this recipe:
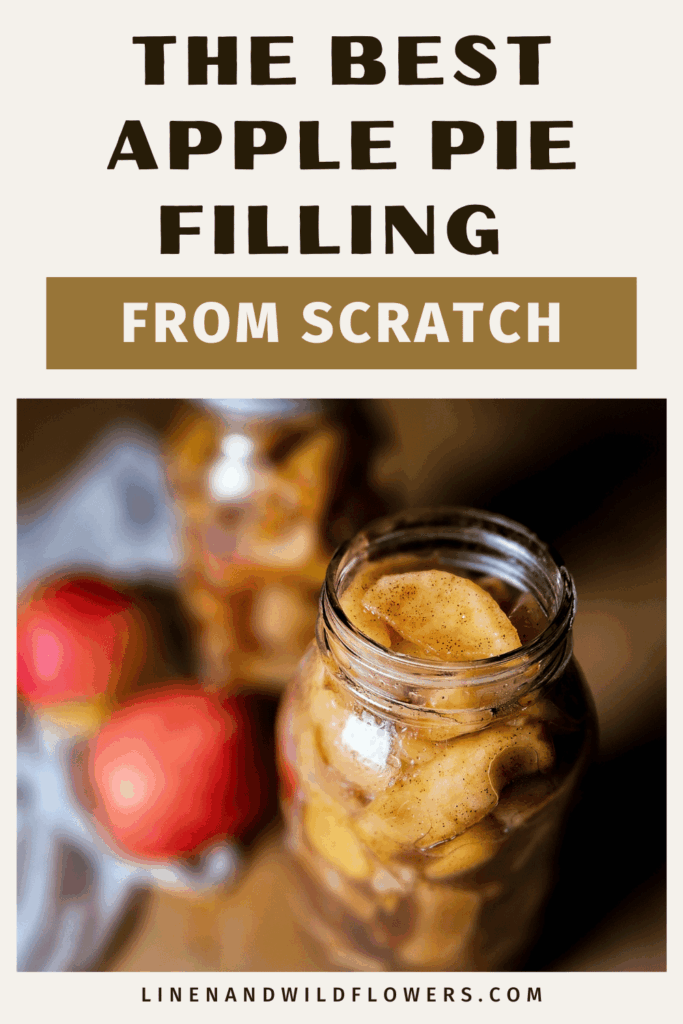
Made with fresh-picked apples and real maple syrup, no canned filling needed. This is an easy apple pie filling that feels special, comforting, cozy, and simple enough for any home baker.
Recipe Ingredients
You’ll need the following ingredients to make this apple pie filling:

The Best Apples for Pie Filling
The secret to the perfect apple pie filling from scratch is using a mix of apples for flavor and texture. I like combining both tart and sweet varieties, so the filling isn’t too sugary or too sharp.
Here are a few favorites:
- Granny Smith: Tart, firm, and keeps its shape while baking.
- Honeycrisp: Juicy, sweet, and adds that irresistible apple flavor.
- Braeburn or Fuji: Balanced sweetness and lovely texture.
- Jonagold or Cortland: Softer apples that cook down beautifully for a thick, luscious filling.
Using a mix gives you the best of both worlds, tender apples with just the right bite and a deep, rich apple flavor. These are truly the best apples for pie combination!
How to Make Crock Pot Apple Pie Filling (Step-by-Step)
If you love a hands-off approach, the crockpotmethod is simple and lets the apples cook low and slow for incredible flavor.
- Prepare the apples: Peel, core, and slice your apples about ¼ inch thick.
- Add everything to your slow cooker: Apples, maple syrup, spices, lemon juice, and cornstarch go right in. Give it a gentle stir.


- Cook on LOW for 3–4 hours: The apples will become tender, and your kitchen will smell like pure autumn!
- Thicken if needed: If the filling appears too thin, stir in a small amount of cornstarch slurry and continue cooking uncovered for an additional 15–20 minutes.


- Cool and store: Let the mixture cool before transferring it to jars or containers.


The crockpot method yields a rich, caramel-like filling that’s perfect for pies, crisps, or freezing for later use.
How to Make Stovetop Apple Pie Filling (Step-by-Step)
Making apple pie filling on the stovetop is quick, easy, and perfect when you want that warm, cozy aroma filling your kitchen.
- Prepare the apples: Peel, core, and slice your apples about ¼ inch thick.
- Combine ingredients: In a large saucepan, mix apples with maple syrup, lemon juice, sugar (if using), and warm spices like cinnamon and nutmeg.
- Cook until tender: Simmer over medium heat for about 10–15 minutes, stirring occasionally, until the apples are tender.
- Thicken the filling: Stir in a cornstarch and water mixture to thicken. Cook for an additional 2–3 minutes, until the sauce is glossy and syrupy.
- Cool and store: Let the filling cool completely before using or storing in jars for later.
This stovetop version is perfect for making a quick batch of pie filling or spooning it over ice cream on the same day!r freezing for later use.
Recipe Tips & Tricks
Tip 1: Mix apple varieties for the best flavor: Using a blend of sweet and tart apples, like Granny Smith, Honeycrisp, and Fuji, gives your filling a perfect balance of flavor and texture. It’s the secret to that classic, old-fashioned apple pie taste.
Tip 2: Don’t overcook your apples: Whether you’re making it on the stovetop or in your crock pot, cook just until the apples are tender but still hold their shape. Overcooking can make the filling too soft, especially if you plan to bake it later in a pie.
Tips 3: Adjust sweetness to taste: Apples vary in sweetness depending on the variety and season. Start with a little less maple syrup or sugar, then taste and adjust as it cooks. It’s easier to add more sweetness than to fix an overly sugary filling!
Make-Ahead Tip
Make-ahead pies: Fill your pie shell and freeze the whole pie (unbaked). Bake straight from frozen, adding 15–20 minutes to your baking time. Having homemade apple pie filling ready in the freezer means you can enjoy a taste of fall any time of year.
Storage & Freezing Tips
Refrigerate: Store your homemade apple pie filling for freezing in an airtight container for up to 5 days. This ensures the freshest taste for your dishes.
Freezing: Spoon cooled filling into freezer bags or containers, leaving a little room at the top for expansion. Freeze up to 3 months.
Thawing: Thaw overnight in the fridge before using, and you’ve got the best slow-cooker apple pie filling ready to go.
More Ways to Use Apple Pie Filling
Don’t limit this to pies! Try your apple pie filling:
What will you drizzle this on first? Share your ideas and inspire others in the comments!
Frequently Asked Questions (FAQ)
Yes, you can! Leaving the peels on adds extra fiber and a rustic texture. Just make sure to wash the apples well and slice them thinly so the skins soften as they cook. It gives the filling a more old-fashioned, homemade look.
This homemade apple pie filling is so versatile! Use it in turnovers, crisps, cobblers, over oatmeal or pancakes, or even layered in parfaits or yogurt bowls. It’s a delicious way to bring the taste of fall into any recipe.
Definitely! This homemade apple pie filling works perfectly for mini pies, hand pies, or even puff pastry turnovers. Just make sure the filling is cooled and slightly thickened before using so it doesn’t leak while baking. It’s an easy, fun way to make individual fall treats!

More Recipes You’ll Fancy!


Looking for Delicious breakfast recipes?
Grab your 5 breakfast recipes now!

I hope you love the homemade apple pie filling. If you make it, please be sure to leave a comment and a rating, so I know how you like it. Enjoy, Xo

Homemade Apple Pie Filling (Two Easy Ways: Stovetop & Crock Pot)
Ingredients
- peeled and sliced apples about 8-10 medium apples
- ½ cup pure maple syrup If you don't have maple syrup on hand, you can substitute it with honey for a similarly rich sweetness or use regular sugar for a more traditional sweetness profile.
- ¼ cup brown sugar optional for extra richness
- 2 tablespoons lemon juice
- 1½ teaspoons ground cinnamon
- ¼ teaspoon nutmeg
- ⅛ teaspoon cloves optional
- ¼ teaspoon salt
- 3 tablespoons cornstarch or ¼ cup flour for thickening
Instructions
How to Make Stovetop Apple Pie Filling Step-by-Step
- Total Time: Approximately 25-30 minutes, including preparation and cooking.
- Prep the apples: Peel, core, and slice your apples about ¼ inch thick.
- Mix the dry ingredients: In a large saucepan, whisk together cornstarch, cinnamon, nutmeg, salt, and cloves.
- Add liquids: Stir in water, maple syrup, brown sugar (if using), and lemon juice.
- Cook until thickened: Bring to a gentle simmer over medium heat, stirring until the mixture starts to thicken and bubble.
- Add apples: Stir in the sliced apples and cook for 8–10 minutes, or until the apples are tender but not mushy. Look for a texture where a fork meets slight resistance, indicating the apples are cooked to perfection without losing their shape.
- For softer, more tender apples, extend the cooking time by a few minutes until they reach your desired texture. For those who prefer firmer apples, reduce the cooking time slightly.
- Please note: Let the apple pie filling cool completely before using it in any desserts. If you're planning to use it in a pie, ensure the filling is fully cooled before adding it to a pie shell. This step is crucial to prevent soggy crusts and achieve the best baking results. Once cooled, you can transfer the filling to jars or containers for storage.
How to Make Crockpot Apple Pie Filling Step-by-Step
- Total Time: Approximately 3-4 hours, including preparation and cooking.
- Prep the apples: Peel, core, and slice the apples evenly (about ¼ inch thick). Place them into your crock pot.
- Mix the dry ingredients: In a small bowl, whisk together cornstarch, cinnamon, nutmeg, allspice, and salt. Sprinkle this mixture evenly over the apples.
- Add the wet ingredients: Pour in the maple syrup, brown sugar (if using), lemon juice, and vanilla extract. Stir gently to coat the apples evenly.
- Slow cook: Cover and cook on LOW for 3 to 4 hours, stirring once or twice, until the apples are tender but not mushy. With just 5 minutes of active work, you can enjoy a hands-off cooking experience, letting the crockpot work its magic while you go about your day.
- Thicken the filling: If the filling seems too thin near the end, mix 1 tablespoon of cornstarch with 2 tablespoons of water and stir it into the crockpot. Continue cooking uncovered for an additional 15–20 minutes, or until the sauce has reached the desired consistency.
- Finish and cool: Stir in butter (optional) for a silky finish. Let the filling cool completely before using in your favorite pie, crisp, or dessert recipe.
Notes
Recipe Tips & Tricks
Mix apple varieties for the best flavor: Using a blend of sweet and tart apples, like Granny Smith, Honeycrisp, and Fuji, gives your filling a perfect balance of flavor and texture. It’s the secret to that classic, old-fashioned apple pie taste. Don’t overcook your apples: Whether you’re making it on the stovetop or in your crock pot, cook just until the apples are tender but still hold their shape. Overcooking can make the filling too soft, especially if you plan to bake it later in a pie. Adjust sweetness to taste: Apples vary in sweetness depending on the variety and season. Start with a little less maple syrup or sugar, then taste and adjust as it cooks. It’s easier to add more sweetness than to fix an overly sugary filling!Make-Ahead Tip
Make-ahead pies: Fill your pie shell and freeze the whole pie (unbaked). Bake straight from frozen, adding 15–20 minutes to your baking time. Having homemade apple pie filling ready in the freezer means you can enjoy a taste of fall any time of year.Nutrition
Nutrition is only an estimate based on the Recipe Analyzer
Every spoonful of this homemade apple pie filling with maple syrup tastes like a memory, warm, sweet, and just a little bit nostalgic.
Making it from scratch reminds me that simple things, like a basket of apples and a drizzle of maple syrup, can turn into something truly special. It’s the kind of recipe that makes your kitchen smell like home, and your heart feel a little fuller.
This homemade apple pie filling is absolutely amazing! My whole house smelled like autumn. The apples turned out perfectly tender with just the right amount of cinnamon and maple sweetness. I love that I can freeze extra batches for quick desserts later. It’s now my go-to recipe for everything from pies to crisps — even over vanilla ice cream. Pure comfort in a jar!
Can’t wait to make my pie this evening, yum!
Yay! Let me know hownyou like it. 🙂
This is great for batch cooking, and I bet your house smells amazing. Can’t wait to try it!
Absolutely! The aroma smelled so delicious!