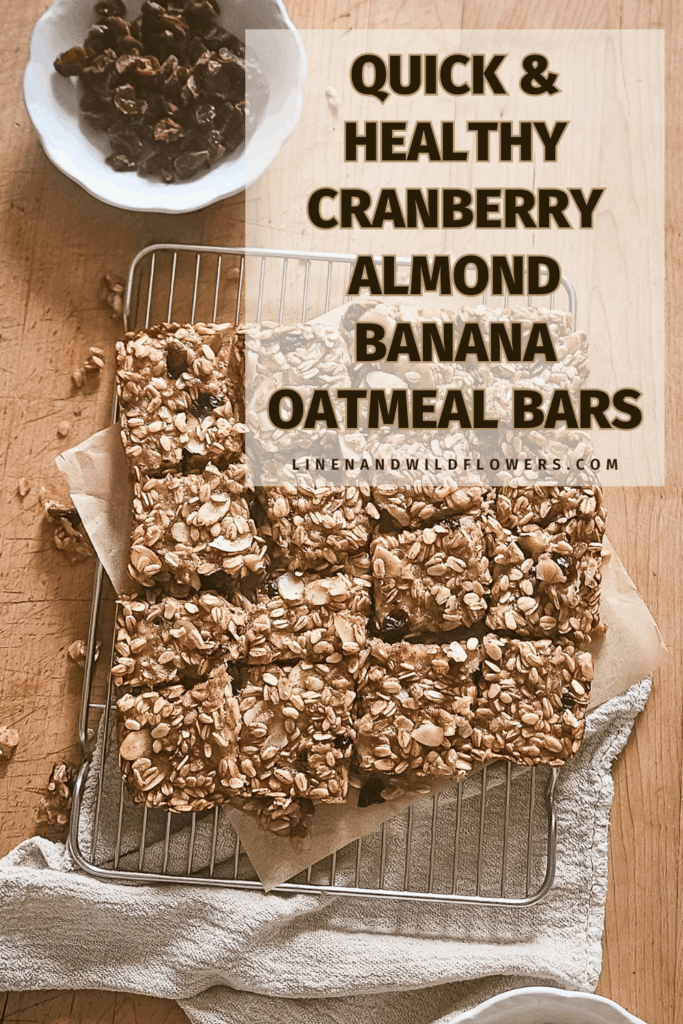
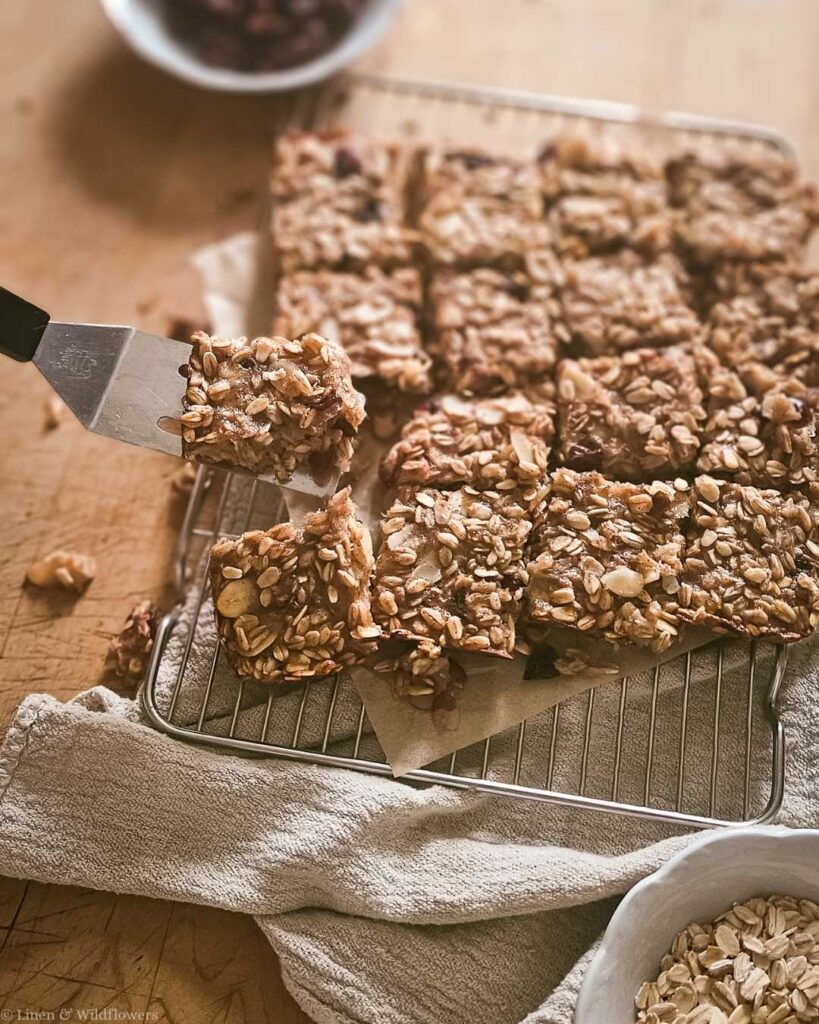
Easy Cranberry Almond Banana Oatmeal Bars
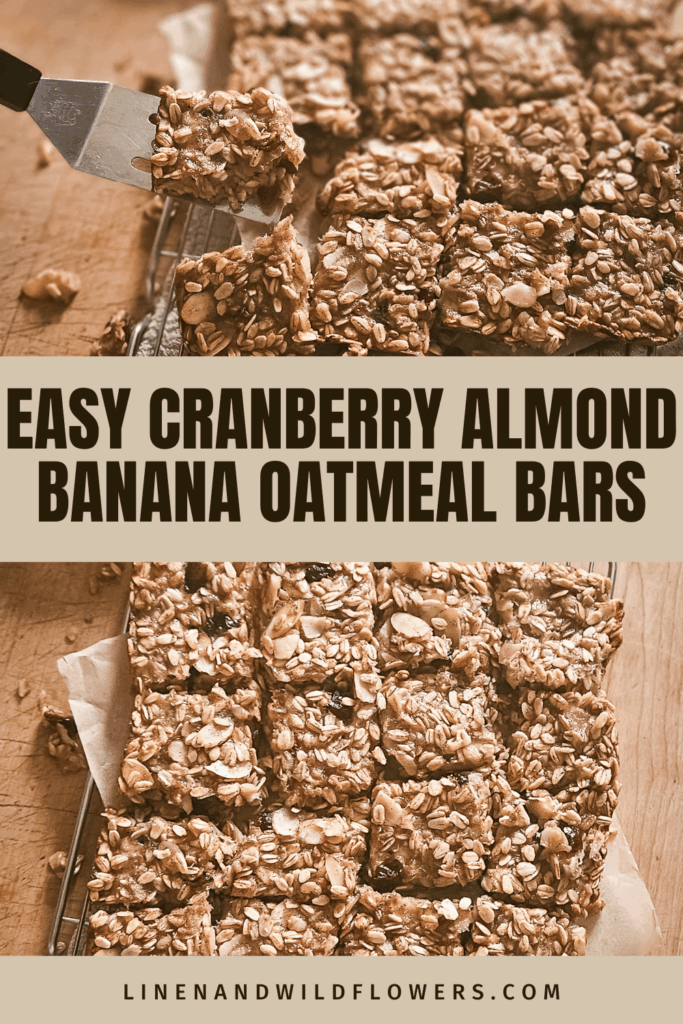
If you love simple, wholesome grab-and-go snacks, these Cranberry Almond Banana Oatmeal Bars are about to be your new best friend. They’re soft, chewy, lightly sweet, and perfect for busy mornings, school lunches, or that mid-afternoon “I just need something” moment.
The best part? They come together with pantry staples, one bowl, and zero fuss, just the way we like it.
Looking for easy soup recipes? Try my recipe, Creamy Root Vegetable Soup – Easy Stovetop Recipe, or this recipe Easy and Delicious Cabbage Soup Recipe
- What you'll love about this recipe:
- Recipe Ingredients
- How to Make Cranberry Almond Banana Oatmeal Bars Step-by-Step
- Recipe Tips & Tricks
- Serving Ideas
- Make-Ahead Tip
- Bake the bars, let them cool completely, then slice and store them in an airtight container. For grab-and-go convenience, wrap each bar individually and freeze for up to 3 months. They thaw in minutes, or warm up beautifully in just 10–15 seconds in the microwave. Perfect for busy mornings or packing lunches!
- Storage & Reheating
- Additions & Substitutions
- Frequently Asked Questions (FAQ)
- More Recipes You'll Fancy!
- Easy Cranberry Almond Banana Oatmeal Bars
- Love simple, homemade snacks?
What you’ll love about this recipe:
They’re the kind of simple recipe you come back to again and again. These oatmeal bars check all the boxes:
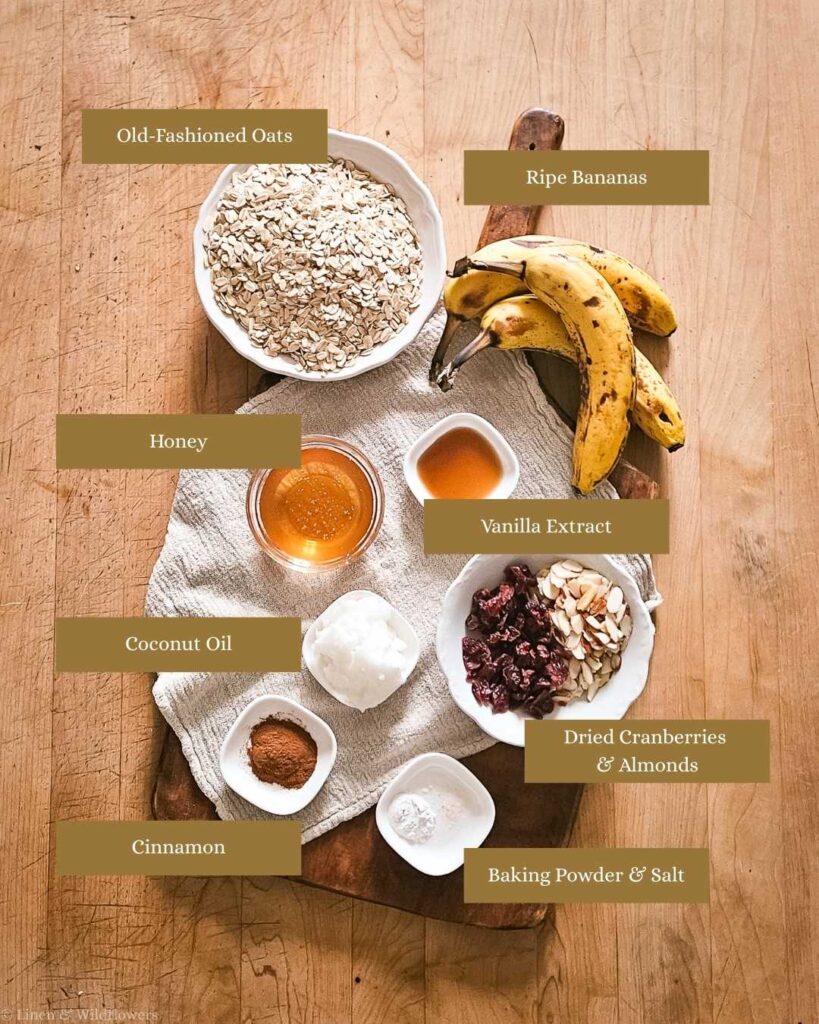
Recipe Ingredients
You’ll need the following ingredients to make this Cranberry Almond Banana Oatmeal Bars:
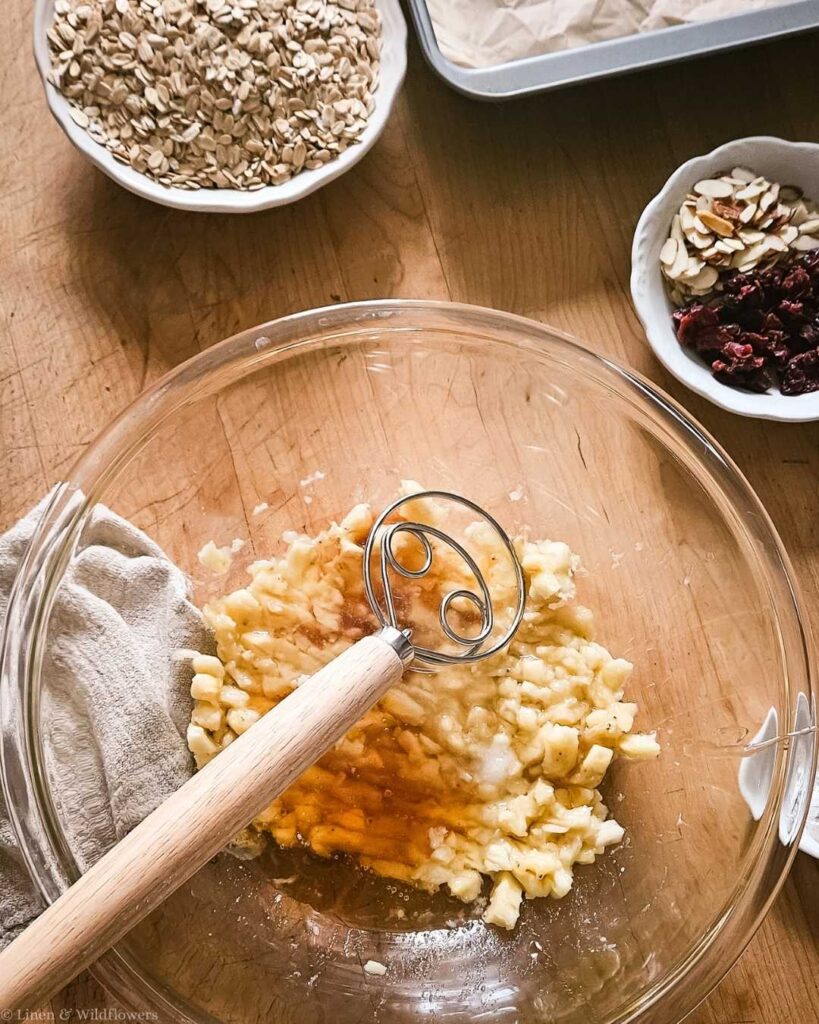
How to Make Cranberry Almond Banana Oatmeal Bars Step-by-Step
Here are quick visual instructions for making Cranberry Almond Banana Oatmeal Bars step-by-step. Remember, the full instructions will be in the printable recipe card below.
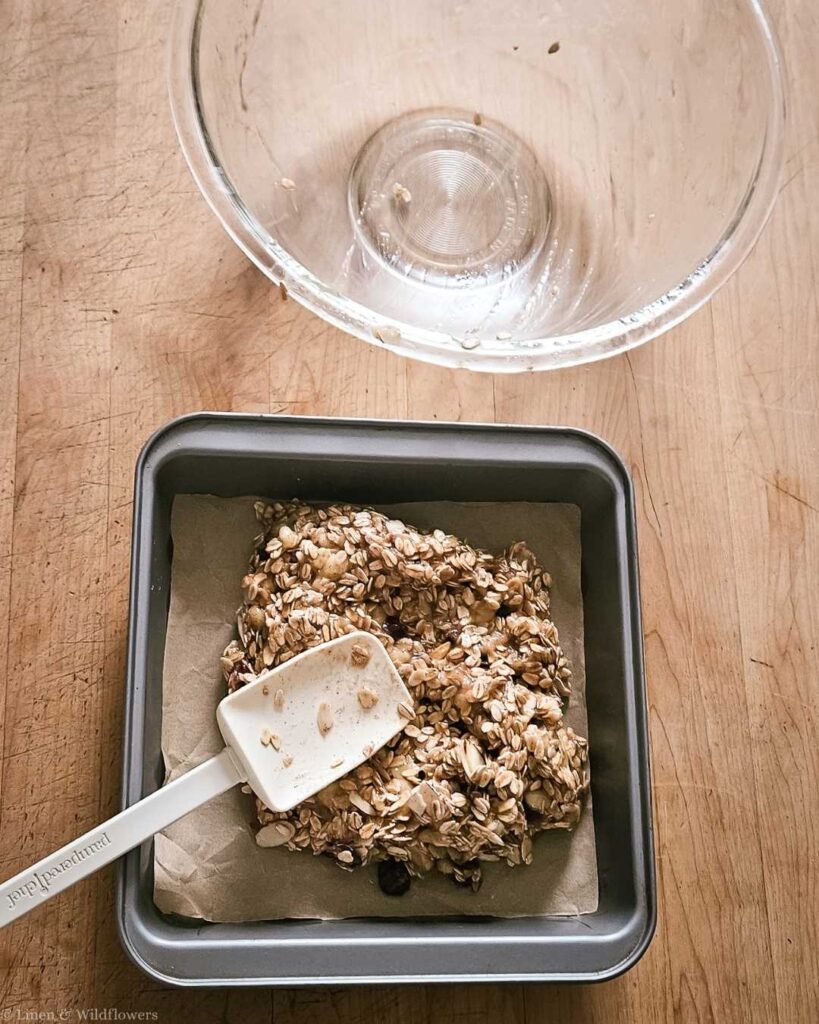
- Prep the pan
- Mix the wet ingredients
- Add the dry ingredients

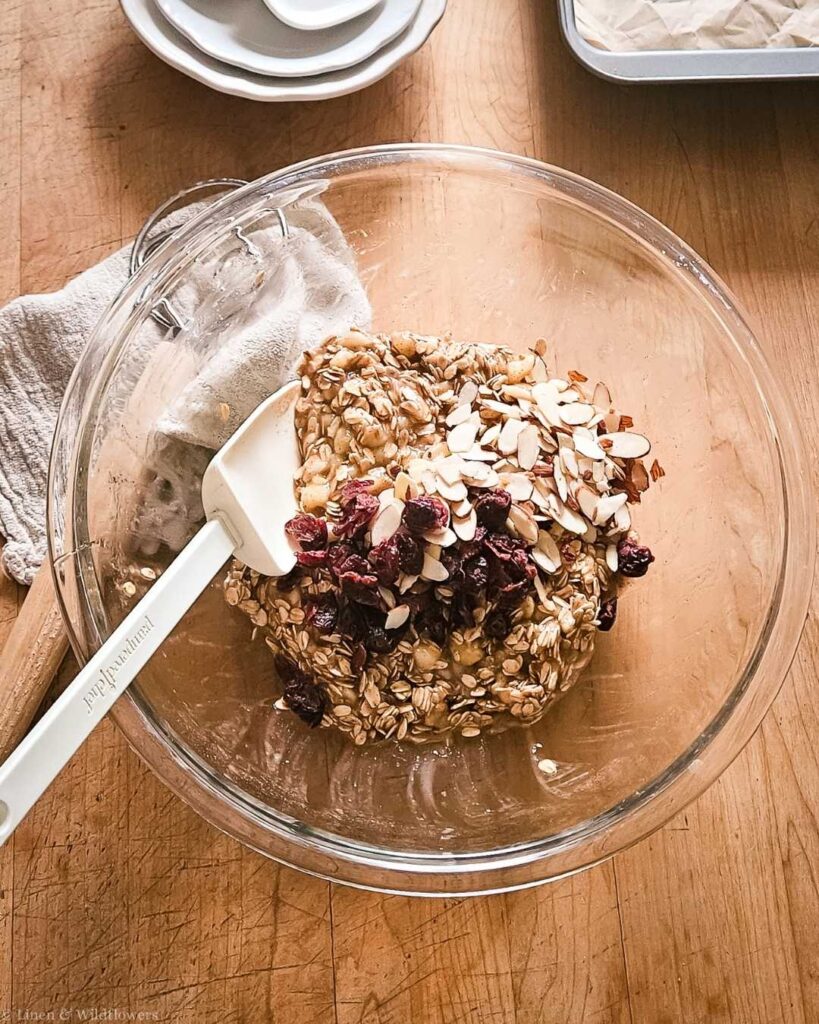
- Fold in the goodies
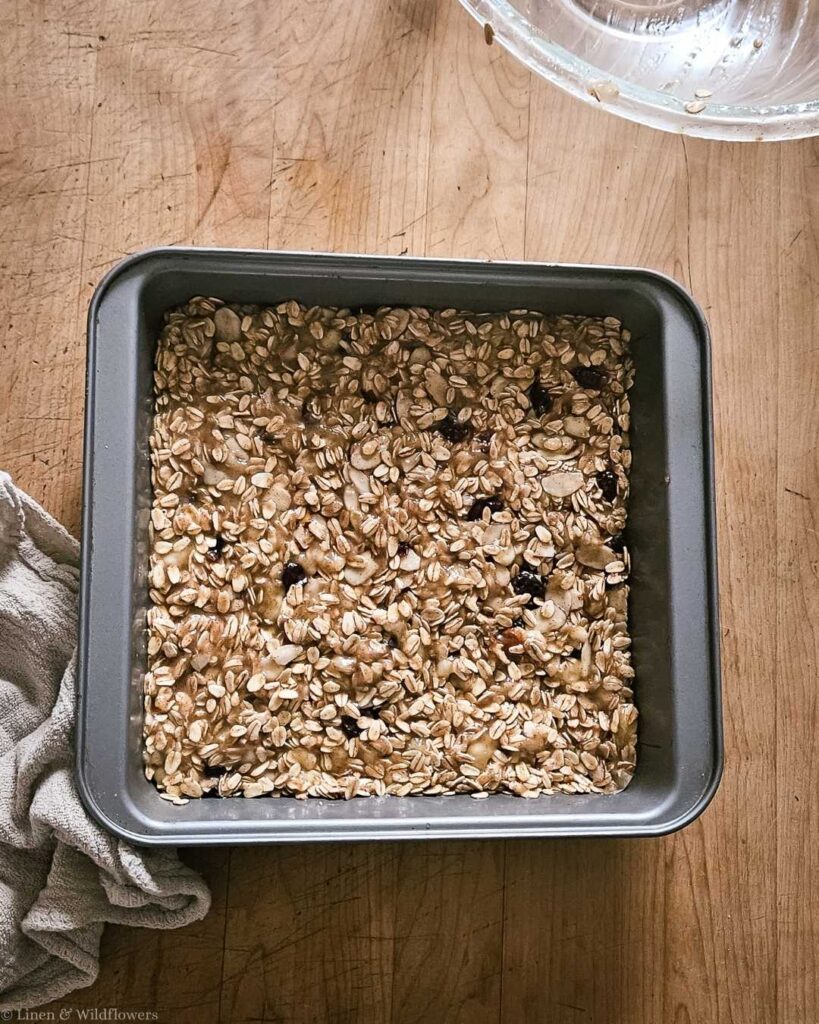
- Press and bake
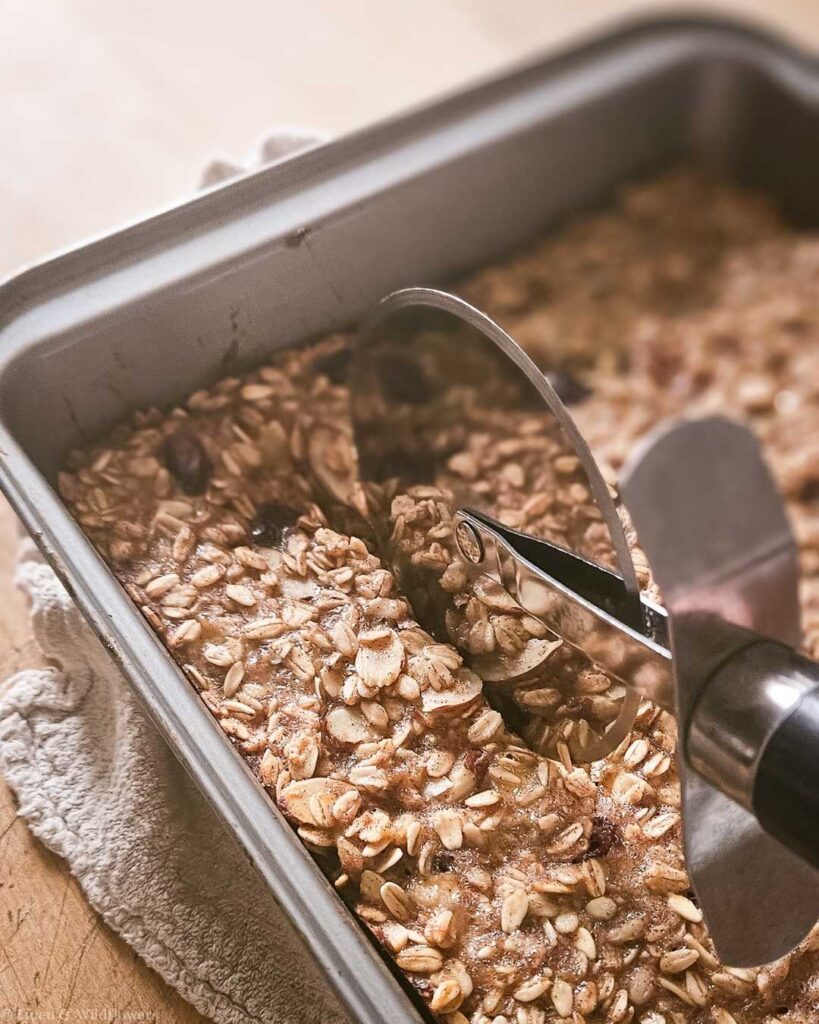
- Cool and slice
Recipe Tips & Tricks
- Use extra-ripe bananas for the best flavor: The spottier and softer, the better; they add natural sweetness and help the bars stick together without eggs.
- Press the mixture firmly into the pan: Packing it down helps the bars bake evenly and keeps them from crumbling when you slice them.
- Let the bars cool completely before cutting: They’ll seem soft right out of the oven, but cooling firms them up and gives you clean, neat slices every time.
Serving Ideas
- Enjoy warm with a drizzle of peanut butter
- Crumble into yogurt for a quick breakfast
- Pack into lunchboxes
- Wrap individually and freeze for grab-and-go snacks.
Pro-Tip: Bake the bars, let them cool completely, then slice and wrap each one individually in parchment or plastic wrap. Freeze them in a single layer first, then transfer them to a bag or container to prevent sticking.
Make-Ahead Tip
Bake the bars, let them cool completely, then slice and store them in an airtight container. For grab-and-go convenience, wrap each bar individually and freeze for up to 3 months. They thaw in minutes, or warm up beautifully in just 10–15 seconds in the microwave. Perfect for busy mornings or packing lunches!
Storage & Reheating
Room temperature: Store on the counter for up to 2–3 days
Refrigerator: Store in an airtight container in the refrigerator for up to 1 week
Freezer: Store them in an airtight container or freezer bag and freeze for up to 3 months. They thaw quickly at room temp, or pop one in the microwave for 10–15 seconds for a warm, grab-and-go snack anytime.
Additions & Substitutions
Additions
Add 1: Chocolate Chips: A handful of semi-sweet or dark chocolate chips adds sweetness and makes the bars feel a little more treat-like.
Add 2: Chia or Flax Seeds: Stir in 1–2 tablespoons for extra fiber and a boost of nutrition without changing the flavor.
Substitutions
Sub 1: Maple Syrup for Honey: Swap the honey 1:1 with maple syrup if you prefer a richer flavor or want a fully dairy-free recipe.
Sub 2: Pumpkin Seeds or Sunflower Seeds: These add the same crunch and texture as nuts but keep the recipe completely nut-free. Perfect for lunchboxes or allergies.
Frequently Asked Questions (FAQ)
Yes, the texture will be slightly softer, but it will still be delicious.
Use certified gluten-free oats, and they’re completely GF.
Yes, the riper the better for sweetness and moisture.
Yep! Use a 9×13 pan and bake a few minutes longer.
Love simple, homemade snacks?
Want more easy, cozy snacks? You’ll get 5 no-fuss, simple, delicious recipes you can make anytime.
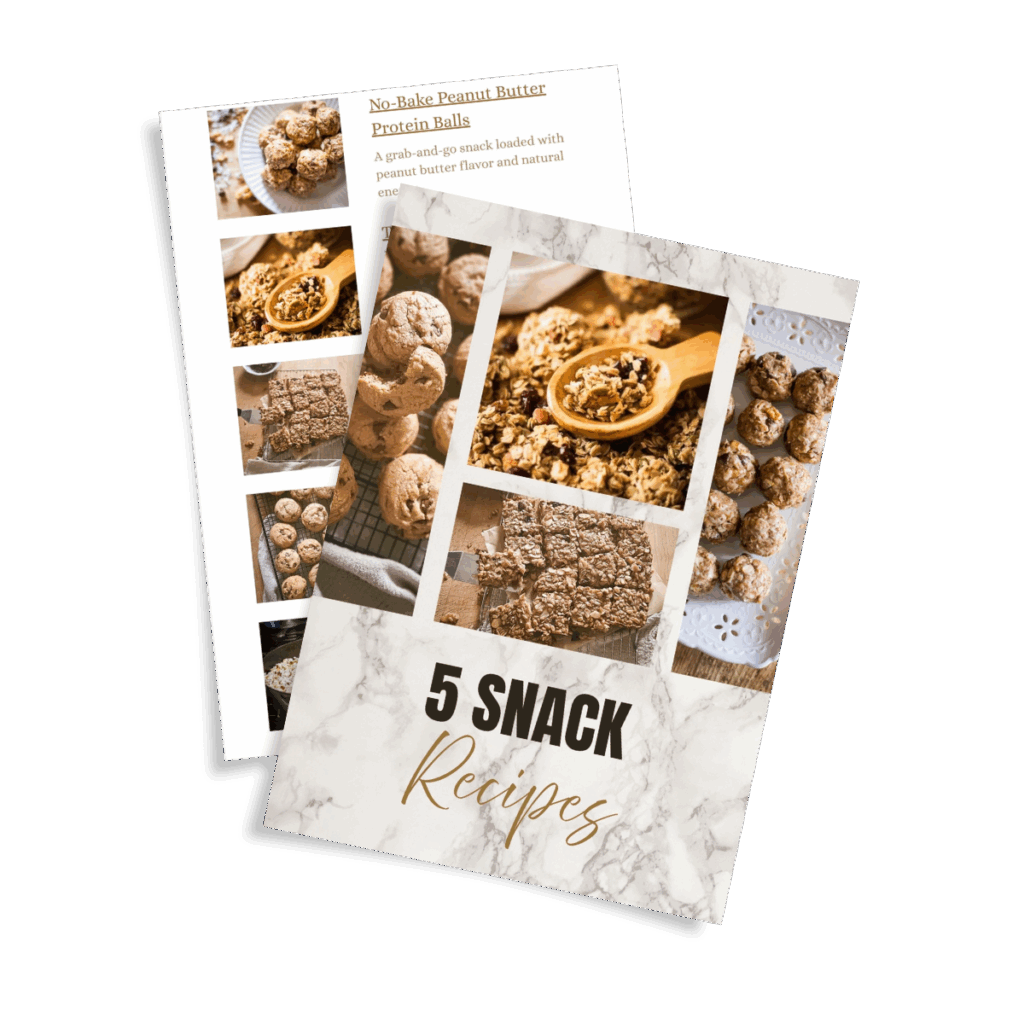
More Recipes You’ll Fancy!
I hope you love the Cranberry Almond Banana Oatmeal Bars . If you make it, please be sure to leave a comment and a rating, so I know how you like it. Enjoy, Xo

Easy Cranberry Almond Banana Oatmeal Bars
Equipment
- 8×8 Baking Pan
- Large Bowl
- Spatula
- Whisk
- Measuring cups + spoons
Ingredients
- 2 large ripe bananas mashed (about 1 cup)
- 2 cups old-fashioned oats
- ¼ cup honey or maple syrup
- ¼ cup coconut oil (melted} or melted butter
- 1 tsp vanilla extract
- 1 tsp cinnamon
- ½ tsp baking powder
- Pinch salt
- ⅓ cup dried cranberries
- ⅓ cup sliced almonds
Instructions
- Preheat your oven to 350°F (177°C).
- Line an 8×8 baking pan with parchment paper.
- In a large bowl, combine the mashed bananas, honey, melted coconut oil, and vanilla.
- Stir in oats, cinnamon, baking powder, and salt until everything is evenly coated.
- Add dried cranberries and sliced almonds. If you’re adding chocolate chips or seeds, now’s the time!
- Spread the mixture into the baking pan and gently press it down to ensure it sets while baking.
- Bake for 20–25 minutes, or until the top is set and lightly golden.
- Let the bars cool completely before slicing (this helps them hold together).
Notes
Optional Add-Ins
- 1/2 cup chocolate chips
- 2 tbsp chia seeds or ground flax
Variations
Switch it up with any combo of:- Chopped nuts: walnuts, pecans
- Dried fruit: peaches, apples, apricots
Nutrition
These Cranberry Almond Banana Oatmeal Bars are one of those easy, wholesome recipes you’ll find yourself making on repeat. They come together with simple pantry staples, they’re endlessly customizable, and they make busy mornings (and snack time!) so much easier.
Whether you enjoy them warm out of the oven or stash a batch in the freezer for later, they’re a cozy little treat that fits right into everyday life.
They’re naturally sweet, super easy to throw together, and perfect for quick breakfasts during the week. I love that they use simple ingredients I always have on hand. This is one of those recipes I will always keep on my regular meal prep rotation!