How to Make Strawberry Jam at Home (With Easy Canning Instructions)
If you’ve ever wondered how to make strawberry jam at home, you’re in for a treat. With just a few ingredients, some patience, and a little know-how, you’ll be amazed at how simple it is to create your own delicious jam, and canning strawberry jam is easier than you think! Not only will you save money, but you’ll also have peace of mind knowing exactly what’s in your spread.
In this post, How to Make Strawberry Jam at Home, I’m walking you through the entire process—from selecting the best fresh strawberries to safely sealing your jars using a water bath canner.
Whether you’re new to home canning or just looking for a tried-and-true strawberry jam recipe, this guide will give you everything you need to feel confident in your kitchen.
Post Updated from July 26, 2021
- If you've ever wondered how to make strawberry jam at home, you're in for a treat. With just a few ingredients, some patience, and a little know-how, you'll be amazed at how simple it is to create your own delicious jam, and canning strawberry jam is easier than you think! Not only will you save money, but you’ll also have peace of mind knowing exactly what’s in your spread.
- How To Make Strawberry Jam Using Pectin
- Supplies You’ll Need for Canning:
- Step-by-Step Instructions: How to Make Canned Strawberry Jam
- Quick Tip: How to Check for Proper Seals
- Helpful Tips for Making and Canning Strawberry Jam
- FAQs About Homemade Strawberry Jam
- What Can I Make with Strawberry Jam?
- More Recipes You’ll Love
- Final Thoughts
- Looking for Delicious breakfast recipes?
How To Make Strawberry Jam Using Pectin
Ingredients:
- 2 quarts of fresh strawberries, washed and hulled
- 1 packet of liquid pectin
- 7 cups of granulated sugar
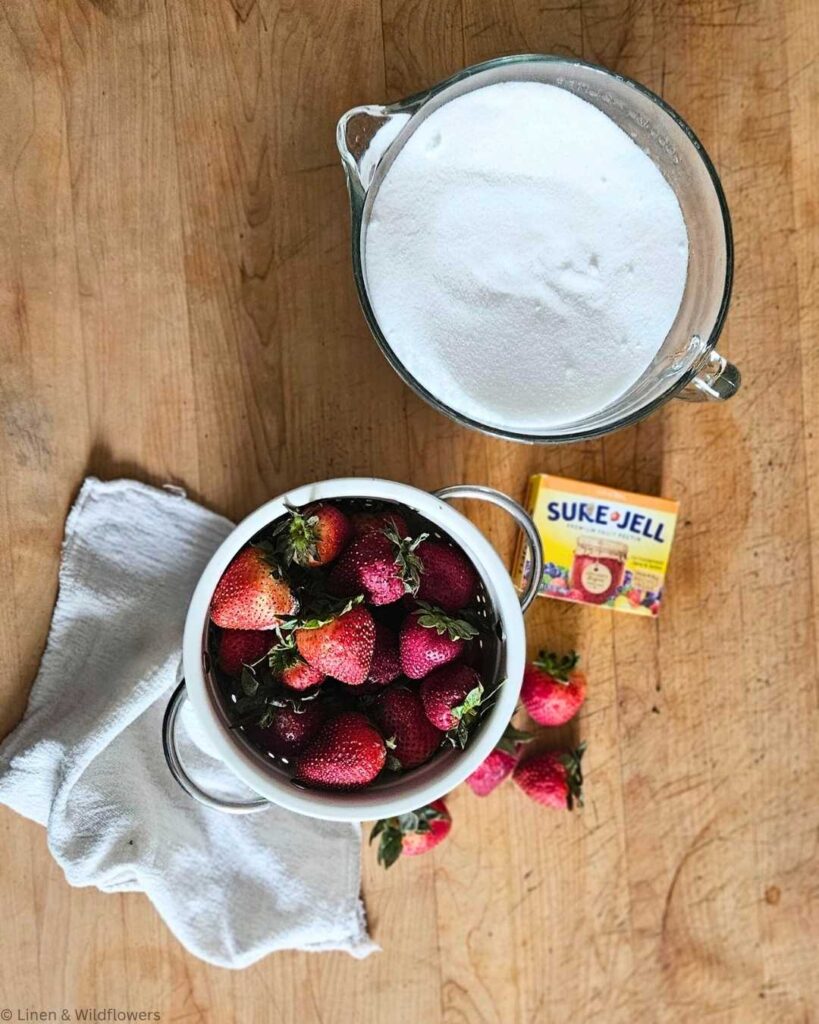
Pro Tip: Use ripe, juicy strawberries from a local farmer’s market for the best flavor and texture.
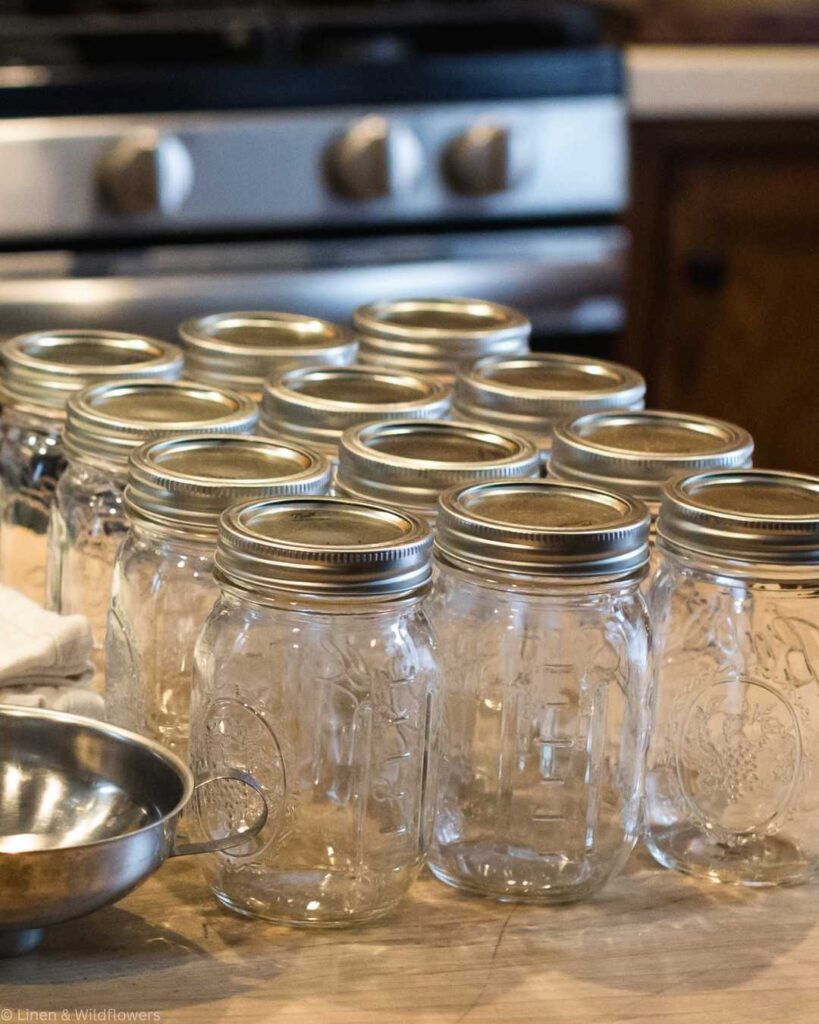
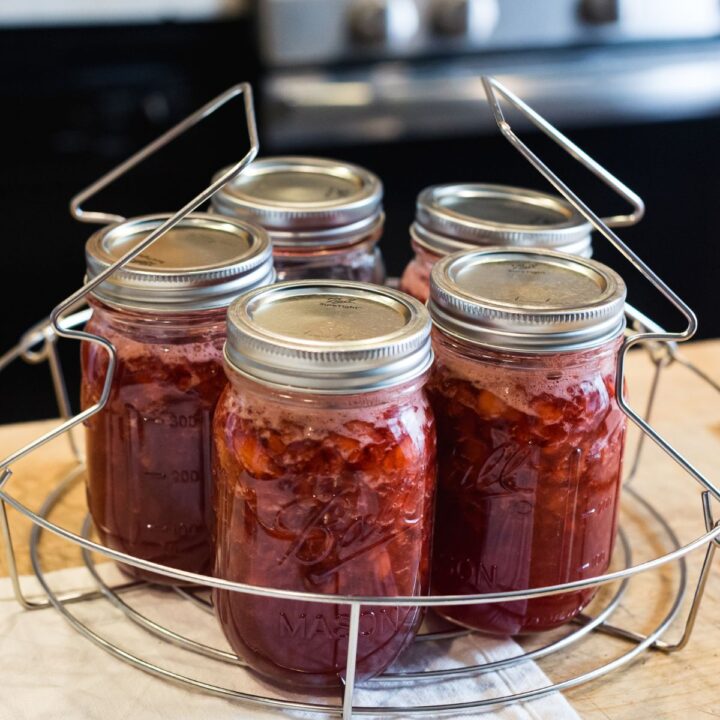
Supplies You’ll Need for Canning:
- 8 oz Ball Mason jars with lids and bands
- Jar tongs
- Water bath canner or large stock pot with rack
- Wide-mouth funnel
- Potato masher
- Ladle
- 4 clean towels
Note: Ensure your canner has a rack so the jars aren’t bumping into each other. This helps prevent glass breakage.

Step-by-Step Instructions: How to Make Canned Strawberry Jam
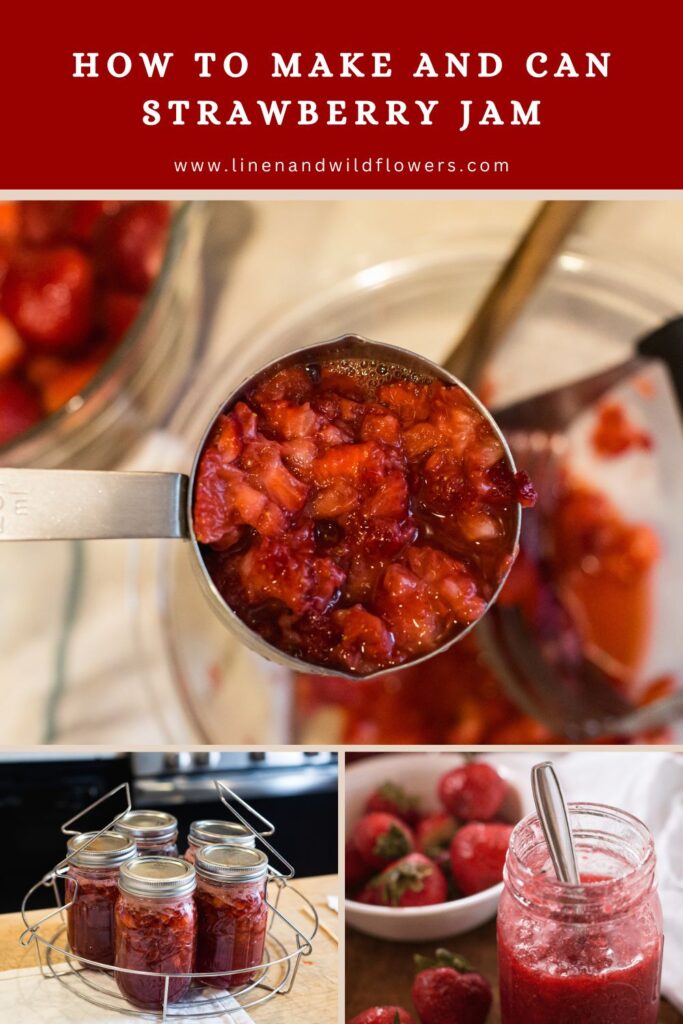
- Wash & prep strawberries, Cut into small pieces, and mash layer by layer in a large bowl using a masher or clean hands.
- Transfer to a large pot and heat on high. Stir continuously.
- Add liquid pectin and continue stirring.
- Bring to a rolling boil. Once achieved, stir in the sugar.
- Continue to stir. Wait until it reaches a second rolling boil.
- Boil for one full minute, then remove from the heat.
- Ladle hot jam into clean jars using the funnel to avoid a mess.
- Stir the jam with a wooden or plastic stick to remove any air bubbles.
- Wipe jar rims to remove excess liquid. Apply lids and tighten bands until just finger-tight.
- Place jars in the water bath canner with 1-2 inches of water covering the tops. Process for 10 minutes.
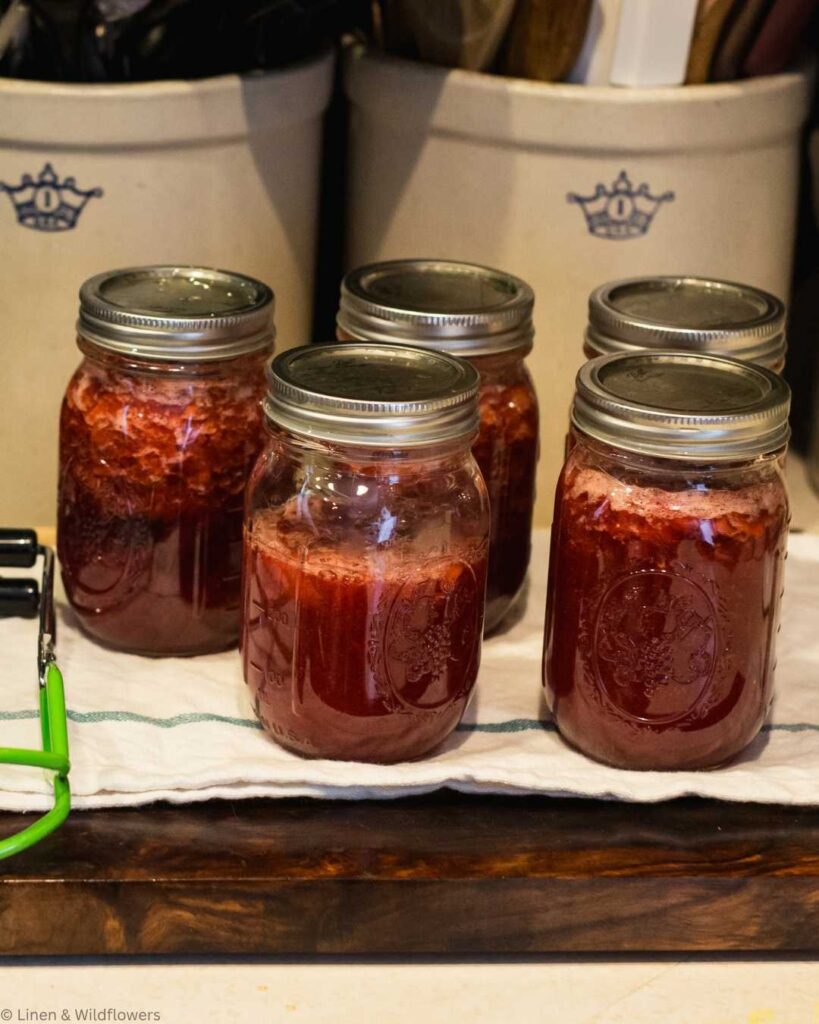
- Remove and let cool on a towel-covered surface. Wait for the “POP” sound, which means the jar has sealed.
- Set jars aside until completely cooled, approximately 24 hours before storing in a dark and cool area.
- Don’t forget to label and date your jars of strawberry jam.


Note: I ended up with one jar that didn’t have enough jam to fill it to the proper level, so I placed it in the refrigerator instead of processing it in the canner. It’s important to know that jars must be filled to the recommended headspace, usually about ¼ inch for jam, so that a proper vacuum seal can form during the water bath process.
If a jar isn’t filled correctly, too much air may be left inside, preventing it from sealing properly and making it unsafe for shelf storage. In this case, the safest option is to refrigerate and enjoy that jar first!
Quick Tip: How to Check for Proper Seals
Once your jars have completely cooled (usually after 12–24 hours), press down on the center of each lid. If the lid doesn’t move or pop up, congratulations—your jar is sealed! If it flexes or makes a popping sound, it didn’t seal properly and should be stored in the refrigerator and used within a few weeks.
Helpful Tips for Making and Canning Strawberry Jam
FAQs About Homemade Strawberry Jam
Using strawberries, sugar, and pectin, and following the steps above, you can easily make your jam from fresh fruit.
Properly canned and sealed strawberry jam is best used within 12 to 18 months. Once opened, refrigerate and use within 1 month.
Signs of spoilage include mold, an off or fermented smell, or bubbles from fermentation. If in doubt, toss it out.
Yes! You can use natural pectin from green apples or let the jam cook longer to naturally thicken. Keep in mind the texture and sweetness will vary.
Looking for Delicious breakfast recipes?
Grab your 5 breakfast recipes now!

What Can I Make with Strawberry Jam?
Wondering what you can make with strawberry jam once your jars are stocked? Here are 10 delicious ideas:
More Recipes You’ll Love
- How to Make Blueberry Jam
- Simple Recipe for How to Make Homemade Strawberry Syrup
- Homemade Honey Butter Recipe
I hope you love this recipe for How to Make Homemade Strawberry Jam. If you make it, please be sure to leave a comment and a rating, so I know how you like it. Enjoy, Xo
How to Make Strawberry Jam at Home (With Easy Canning Instructions)
If you've ever wondered how to make strawberry jam at home, you're in for
a treat. With just a few ingredients, some patience, and a little know-how,
you'll be amazed at how simple it is to create your delicious jam, and canning
strawberry jam is easier than you think! Not only will you save money, but
you’ll also have peace of mind knowing exactly what’s in your spread.
Ingredients
- 2 quarts of fresh strawberries, washed and hulled
- 1 packet of liquid pectin
- 7 cups of granulated sugar
Instructions
- Wash & prep strawberries, Cut into small pieces, and mash layer by layer in a large bowl using a masher or clean hands.
- Transfer to a large pot and heat on high. Stir continuously.
- Add liquid pectin and continue stirring.
- Bring to a rolling boil. Once achieved, stir in the sugar.
- Continue to stir. Wait until it reaches a second rolling boil.
- Boil for one full minute, then remove from the heat.
- Ladle hot jam into clean jars using the funnel to avoid a mess.
- Stir the jam with a wooden or plastic stick to remove any air bubbles.
- Wipe jar rims to remove excess liquid. Apply lids and tighten bands until just finger-tight.
- Place jars in the water bath canner with 1-2 inches of water covering the tops. Process for 10 minutes.
- Remove and let cool on a towel-covered surface. Wait for the “POP” sound, which means the jar has sealed.
- Set jars aside until completely cooled, approximately 24 hours before storing in a dark and cool area.
- Don’t forget to label and date your jars of strawberry jam.
Notes
Helpful Tips for Making and Canning Strawberry Jam
- Use fresh, firm berries – Overripe or mushy strawberries won’t set well.
- Don’t skip the water bath! It ensures safe preservation.
- Always label your jars with the date made.
- Avoid over-tightening the lids before water bathing.
- Store jars in a cool, dark pantry for up to 18 months.
Quick Tip: How to Check for Proper Seals
Once your jars have completely cooled (usually after 12–24 hours), press down on the center of each lid. If the lid doesn't move or pop up, congratulations—your jar is sealed! If it flexes or makes a popping sound, it didn’t seal properly and should be stored in the refrigerator and used within a few weeks.
Final Thoughts
Learning how to make strawberry jam from fresh strawberries at home is such a rewarding and delicious experience. With just a little time and a few tools, you can stock your pantry with sweet, summery goodness to enjoy all year long.
Whether you’re a beginner or looking to expand your homesteading skills, making and canning your own jam is a great place to start. And believe me, you’ll be hooked once you hear that satisfying pop of a sealed jar!
This post is so helpful. I love home made jam but have been apprehensive because I thought it was so complicated. I tried your recipe, and the jam came out perfectly. Such an easy and delicious recipe. Thanks for sharing.
Yeeeeees. Found this just in time! With strawberries all going on sale, I plan to get a bunch.
Thank you sharing! I can’t wait to try it!