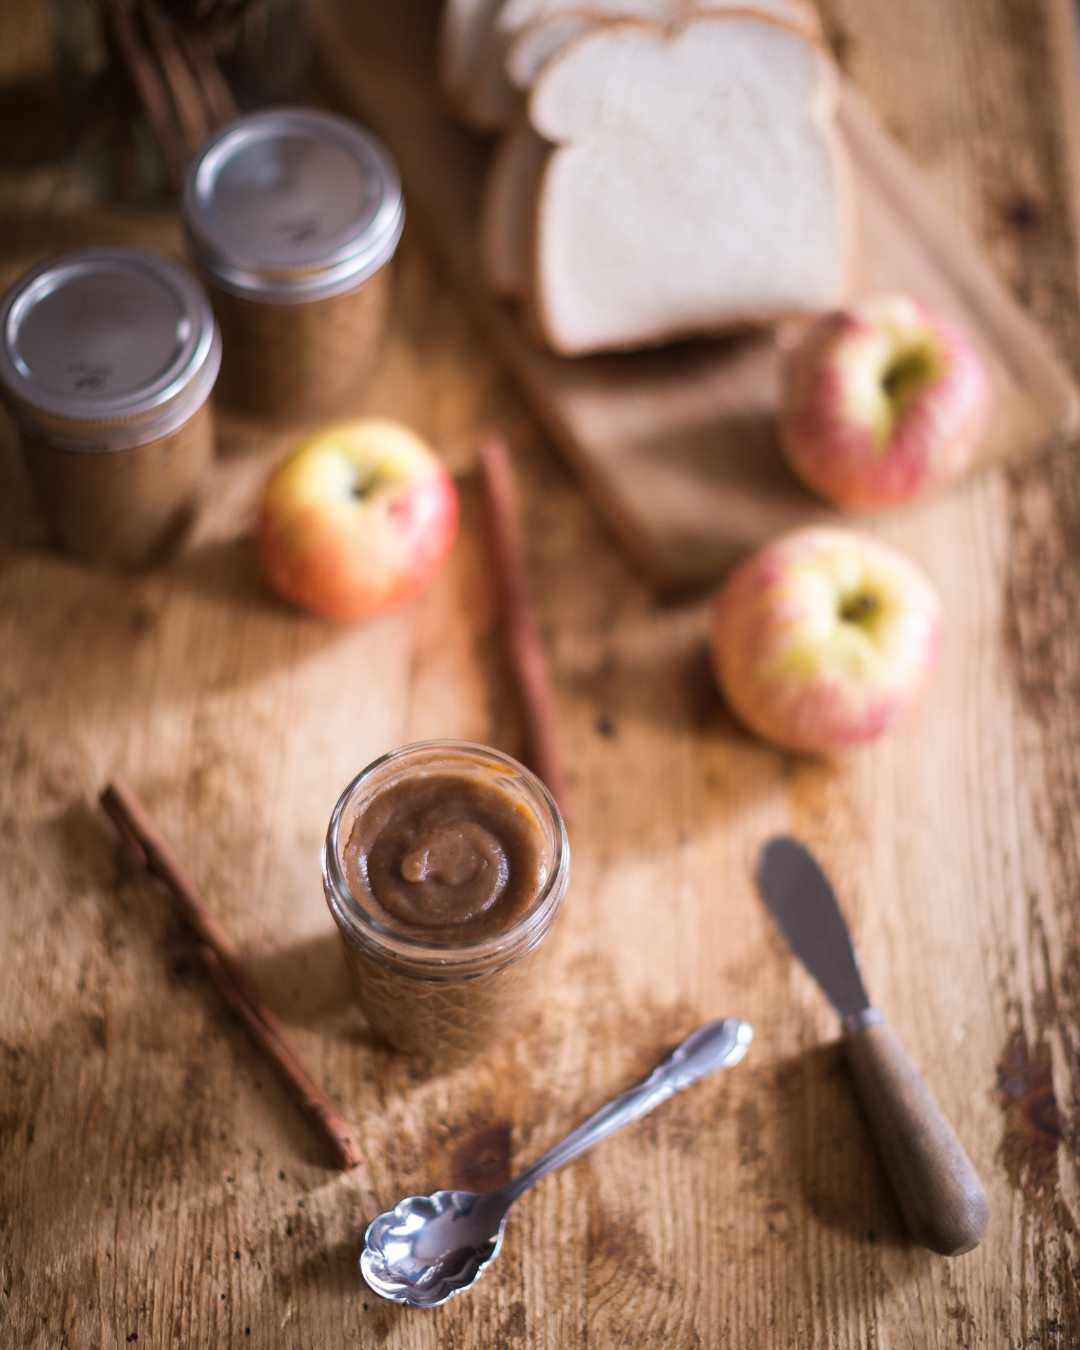
How to Make Apple Butter on The Stovetop

How to Make Apple Butter on The Stovetop is a warm, spiced treat that perfectly captures the essence of fall.
Whether you’ve just returned from an apple-picking adventure or are looking for a way to use your fresh apples, this homemade apple butter recipe is a must-try. The best part? It’s incredibly easy to make. It only requires a handful of commonly used pantry ingredients, a large pot, and a little patience. This stovetop recipe for apple butter is simple and delicious.
When you have an abundance of apples, Apple butter or Applesauce is what comes to mind to use them up. With a handful of ingredients from your pantry, you can create this rich and smooth spread in no time. Making apple butter is simple, and it is a classic fall favorite you can enjoy any time of the day.
This post contains affiliate links to products I love ♥ See my full disclaimer here!
WHAT IS APPLE BUTTER
Apple butter is more than just a delicious spread—it’s a great addition to baked goods, pancakes, toast, and even savory dishes. The deep, caramelized apple flavor pairs beautifully with cinnamon sticks, apple pie spice, and other fall spices. Plus, it makes a wonderful homemade gift, especially when canned in jars and tied with a cute label.
Tools needed
- Large Pot
- Immersion Blender (Optional)
- Food Processor (Optional)
- Masher
- Large Spoon
- Mason Jars
- Canning jars and lids (for storage)
- Ladle
Ingredients
- 5 pounds of fresh apples (sweet and tart varieties like Granny Smith or Golden Delicious work well)
- ¼ tsp salt
- 2 Tbsp lemon juice
- 1.5 tsp ground cinnamon
- ¼ tsp ground cloves
- ¼ cup pure maple syrup
- (adjust to taste depending on how sweet you want it)
- 2 cups of Water
How to Make Apple Butter on the Stovetop
Step 1: Prepare the Apples
Start by washing your fresh apples thoroughly. Depending on your preference, you can use unpeeled and peeled apples for this apple butter recipe. Sweet apple varieties like Golden Delicious or sweeter varieties tend to flavor nicely, but mixing in a few tart apples like Granny Smith adds the perfect balance. Remove the cores and cut the apples into small chunks.
Step 2: Cook the Apples
Next, add the chopped apples to a large pot over medium-high heat. Add enough water (about 1 to 2 cups) to cover the apples. Cover and cook on low heat, occasionally stirring, until apples are reduced for 2 hours. Bring the mixture to a simmer and cook until the apples are soft, about 20 minutes. Once the apples are softened, use a wooden spoon to mash them into a chunky applesauce consistency. You can use a regular blender to blend the mixture until smooth for a smoother texture.
Step 3: Spice it Up
Once your apple mixture has cooled slightly, add the salt, lemon juice, ground cinnamon, ground cloves, and pure maple syrup. Stir everything together and bring it to a simmer over medium-low heat, keeping an eye on it to prevent scorching.
Step 4: Slow-Cook the Apple Butter
Now comes the magic! Reduce the heat to low and cook the apple mixture, stirring occasionally, for about 2–3 hours. This slow-cooking process helps deepen the flavor and thicken the apple butter to that perfect spreadable consistency. The longer it cooks, the richer and more flavorful it becomes. If you want a faster option, you can use a pressure cooker or Instant Pot, significantly reducing cooking time.
Step 5: Test the Consistency
Puree the apple mixture in a food processor or an immersion blender until it has a smooth, buttery texture. Spooning the mixture, you can test the consistency as the apple butter thickens. It should leave a trail behind and hold its shape. If it’s too runny, continue cooking until it reaches your desired thickness.
Step 6: Prepare Jars
While your apple butter is cooking, sterilize your canning jars by washing them with hot water and placing them in a boiling water bath or a pressure canner. This step ensures that your jars are clean and ready for storing. When the apple butter is done, ladle it into the hot jars, leaving about 1/4 inch of space at the rim. Wipe the tops of the jars with a clean cloth to remove any spills, then place the lids on top and screw on the rings until they’re finger-tight.
Step 7: Canning and Storing
For a more traditional method of preserving apple butter, you can process the jars using a water bath canner. Place the filled jars in the canner and boil for 10 minutes. This will help create a seal and extend the shelf life of your apple butter. Once sealed, your jars of apple butter will be ready to store in a cool, dark place. If you prefer a more immediate use, let the jars cool and store them in the fridge.
Enjoy Your Homemade Apple Butter
Lastly, once your apple butter has cooled, you’ll have a batch of homemade goodness ready to spread on toast, pancakes, or even in an apple butter cake! The deep, rich flavor with a touch of cinnamon and a little sweet fall flavor will become one of your favorite things about the fall season.

Tips for Next Time:
- If you want a smoother texture, skip the cinnamon sticks and allspice and puree the apple mixture with a regular blender.
- If you want to make sweeter apple butter, consider adding more sweet apples like Gala or Fuji.
- Add a teaspoon of pumpkin pie spice for a different flavor profile.
- For an easy, hands-off approach, make a batch of crockpot apples better next time.
This homemade apple butter recipe is a great way to use apples after a trip to the orchard and will make your house smell amazing. Whether you’re canning it for later or enjoying it right away, it’s a delicious spread that brings all the cozy autumn vibes. Enjoy the process, and most importantly, enjoy the sweet reward at the end!
Sweet & Savory Ideas Apple Butter Can Go On!
Apple butter is a deliciously versatile spread that complements everything from breakfast staples to savory meals and even desserts. Whether used as a topping, filling, or ingredient in other recipes, it adds a touch of sweetness, spice, and warmth to any dish. The possibilities are endless!
Muffins and Scones
Apple butter makes a great spread for muffins or scones, adding an extra layer of flavor. It works especially well with cinnamon or spiced scones, enhancing the warm, cozy flavors.
Pork Chops or Chicken
Apple butter is also a fantastic accompaniment to savory dishes like roasted pork or chicken. It adds a subtle sweetness and depth of flavor that complements the savory meats. Before roasting, spread it on the meat or serve it as a glaze or sauce.
Ice Cream
Serve apple butter over vanilla or cinnamon ice cream for a fun dessert. A warm, comforting topping gives the ice cream a rich, spiced apple flavor.
Crackers
Spread apple butter on crackers, either alone or with a slice of cheese, for an easy and satisfying snack. This recipe also makes a great addition to a charcuterie board!
Toast with Nut Butter
If you want a protein-packed snack, spread both apple butter and almond or cashew butter on toast. The combination of sweetness from the apple butter and the richness of the nut butter creates a perfect flavor balance.
Hot Biscuits or Cornbread
For a southern-inspired treat, serve apple butter on hot cornbread or biscuits. It’s a comforting and sweet addition to these savory baked goods. The flaky, buttery biscuits and the creamy, spiced apple butter make for a cozy, comforting treat. Perfect for a brunch spread or as a snack!

Commonly Asked Questions
What is Apple Butter?
It is a delicious, rich, smooth, and spicier spread concentrated from applesauce, perfect for spreading on toast, mixing into oatmeal, or using as a flavorful addition to baked goods.
Can Apple Butter be made in a crock pot?
Yes, Absolutely! Making it on the stove can be done relatively quickly. Before adding the apples to your crockpot, puree them in a blender or food processor. Add the chopped apples and the rest of the ingredients to the crockpot and let it cook for a few hours.
Do I have to Peel the Apples?
It’s not necessary; however, that is entirely up to you. You will find that alot of recipes call for the apples to be peeled & cored before cooking the apples. I don’t mind some speckles of apple skins in my apple butter; it saves alot of time and makes it easier.
How to Store Apple Butter?
Once you’ve made or opened a jar of apple butter, transfer it to an airtight container or leave it in its original sealed jar. Store it in the refrigerator at 35-40°F. Homemade apple butter typically lasts 2-3 weeks when refrigerated. It can be made for refrigeration. Store it in a seal-tight container, such as a mason jar, and it will stay fresh.
Can do I can Apple Butter?
You sure can. If you want to preserve apple butter for a long time and are familiar with canning, you can use the water-bath canning method to extend its shelf life for up to a year.
Is apple butter good with cheese?
Absolutely! Apple butter is a fantastic pairing with sharp cheddar, brie, or goat cheese. For a sweet-and-savory combination, spread it on crackers with cheese or serve it on a charcuterie board.
What types of bread go best with apple butter?
Apple butter pairs well with almost any bread, but it’s especially delicious on crusty sourdough, warm biscuits, cinnamon-raisin bread, or soft brioche. It’s also a great spread for whole-grain bread if you want a heartier option.

How to Make Apple Butter
Apple butter is rich, smooth, and spicier spread concentrated from applesauce. When you have an abundance of apples, Apple butter or Applesauce is what comes to mind to use them up. With a handful of ingredients from your pantry, you can create this rich and smooth spread in no time. Making apple butter is simple, and it is a classic fall favorite you can enjoy any time of the day.
Ingredients
- Five medium apples, cored and roughly chopped.
- ¼ tsp salt
- 2 Tbsp lemon juice
- 1.5 tsp ground cinnamon
- ¼ tsp ground cloves
- ¼ cup pure maple syrup
Instructions
Step 1: Prepare the Apples
Start by washing your fresh apples thoroughly. Depending on your preference, you can use unpeeled and peeled apples for this apple butter recipe. Sweet apple varieties like Golden Delicious or sweeter varieties tend to flavor nicely, but mixing in a few tart apples like Granny Smith adds the perfect balance. Remove the cores and cut the apples into small chunks.
Step 2: Cook the Apples
Next, add the chopped apples to a large pot over medium-high heat. Add enough water (about 1 to 2 cups) to cover the apples. Cover and cook on low heat, occasionally stirring, until apples are reduced for 2 hours. Bring the mixture to a simmer and cook until the apples are soft, about 20 minutes. Once the apples are softened, use a wooden spoon to mash them into a chunky applesauce consistency. You can use a regular blender to blend the mixture until smooth for a smoother texture.
Step 3: Spice it Up
Once your apple mixture has cooled slightly, add the salt, lemon juice, ground cinnamon, ground cloves, and pure maple syrup. Stir everything together and bring it to a simmer over medium-low heat, keeping an eye on it to prevent scorching.
Step 4: Slow-Cook the Apple Butter
Now comes the magic! Reduce the heat to low and cook the apple mixture, stirring occasionally, for about 2–3 hours. This slow-cooking process helps deepen the flavor and thicken the apple butter to that perfect spreadable consistency. The longer it cooks, the richer and more flavorful it becomes. If you want a faster option, you can use a pressure cooker or Instant Pot, significantly reducing cooking time.
Step 5: Test the Consistency
Puree the apple mixture in a food processor or an immersion blender until it has a smooth, buttery texture. Spooning the mixture, you can test the consistency as the apple butter thickens. It should leave a trail behind and hold its shape. If it’s too runny, continue cooking until it reaches your desired thickness.
Step 6: Prepare Jars
While your apple butter is cooking, sterilize your canning jars by washing them with hot water and placing them in a boiling water bath or a pressure canner. This step ensures that your jars are clean and ready for storing. When the apple butter is done, ladle it into the hot jars, leaving about 1/4 inch of space at the rim. Wipe the tops of the jars with a clean cloth to remove any spills, then place the lids on top and screw on the rings until they’re finger-tight.
Step 7: Canning and Storing
For a more traditional method of preserving apple butter, you can process the jars using a water bath canner. Place the filled jars in the canner and boil for 10 minutes. This will help create a seal and extend the shelf life of your apple butter. Once sealed, your jars of apple butter will be ready to store in a cool, dark place. If you prefer a more immediate use, let the jars cool and store them in the fridge.
Enjoy Your Homemade Apple Butter
Lastly, once your apple butter has cooled, you’ll have a batch of homemade goodness ready to spread on toast, pancakes, or even in an apple butter cake! The deep, rich flavor with a touch of cinnamon and a little sweet fall flavor will become one of your favorite things about the fall season.
Nutrition Information
Yield 6 Serving Size 1Amount Per Serving Calories 117Total Fat 0gSaturated Fat 0gTrans Fat 0gUnsaturated Fat 0gCholesterol 0mgSodium 102mgCarbohydrates 31gFiber 4gSugar 24gProtein 0g
Calculated Nutrition is an estimate.
Final thoughts…
Apple butter is a timeless, versatile spread that brings a touch of cozy warmth to any dish. Whether you’re making a homemade batch with fresh apples or enjoying a store-bought jar, its sweet, spiced flavor is perfect for everything from breakfast to dessert and even savory meals.
The beauty of apple butter lies in its simplicity—it’s made from just a few simple ingredients, yet it delivers a depth of flavor that enhances so many dishes. Plus, with proper storage methods like refrigeration, freezing, or canning, you can savor its deliciousness long after apple season ends.
Experiment with different ways to use apple butter, from spreading it on toast to incorporating it into recipes like glazes, baked goods, or even smoothies. With its rich history and endless possibilities, apple butter truly earns its spot as a must-have in your kitchen.
No matter how you enjoy it, apple butter is more than just a spread—it’s a little jar of fall flavor, ready to brighten your day. So, grab some fresh apples or a jar from the store and start exploring the many ways to make apple butter a favorite in your home!
Have you made this recipe? Let me know in the comments & be sure to share this recipe with your family & friends.
Here are some recommended posts that may Fancy your interest!
How to make homemade Applesauce
Simple Recipe for How to Make Homemade Strawberry Syrup

Gain Access to the Freebie Library
Accessing the freebie library is easy and provides many helpful resources to boost creativity and organization. Inside, you’ll find a variety of free downloads like art prints, handy checklists, a cleaning list, a gardening journal, and much more. Whether you want to stay organized, inspired, or add charm to your home or work, these freebies are designed to help you along the way! Visit the library, pick what you need, and enjoy these exclusive resources today.
I have been looking for a recipe for apple butter and this one seems easy. Thank you for sharing!
Et me know how you like it. It is so easy to make.
Never had apple butter. From your pics it reminds me of a clash between nutella and peanuts. But a great way to preserve apples 🍎. Thanks 😊 for sharing.
I love apple butter but have never made it, I think I will give it a try, thanks
This looks delicious and sounds so easy!! Thanks for sharing!
It definitely is! Thank you!
Yummy! Thanks for sharing.
~Michelle
https://michellescrazybusylife.net
You are very welcome!